


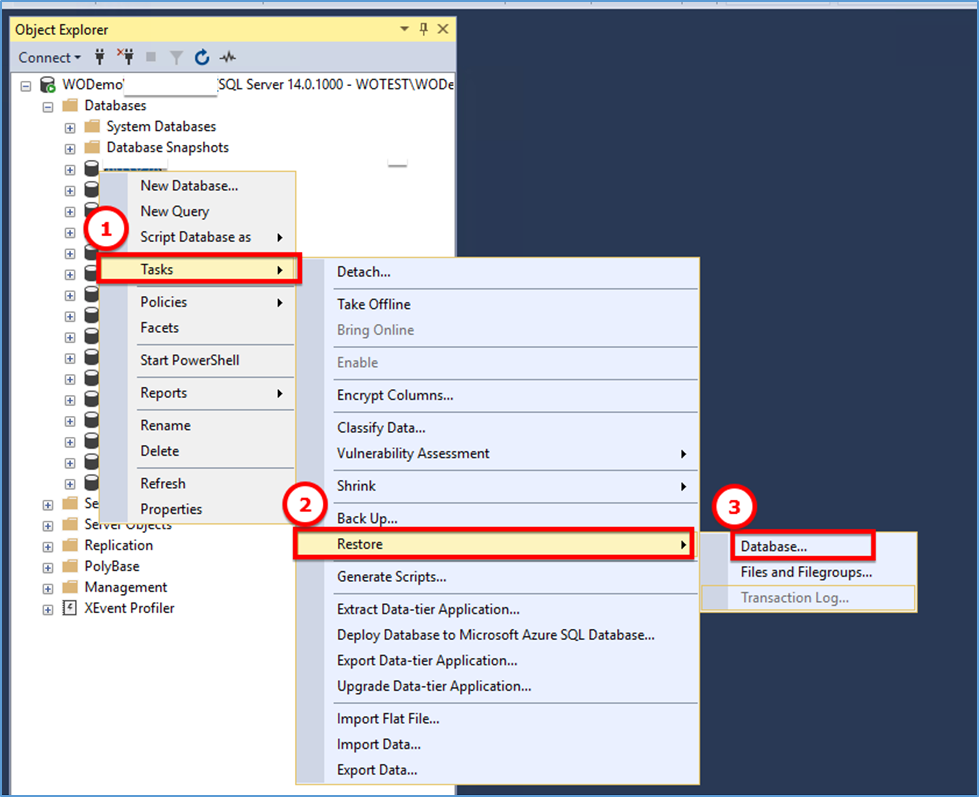
- Select the database and then right-click on the database, select Tasks > Restore > Database, which will open the Restore Database dialog box
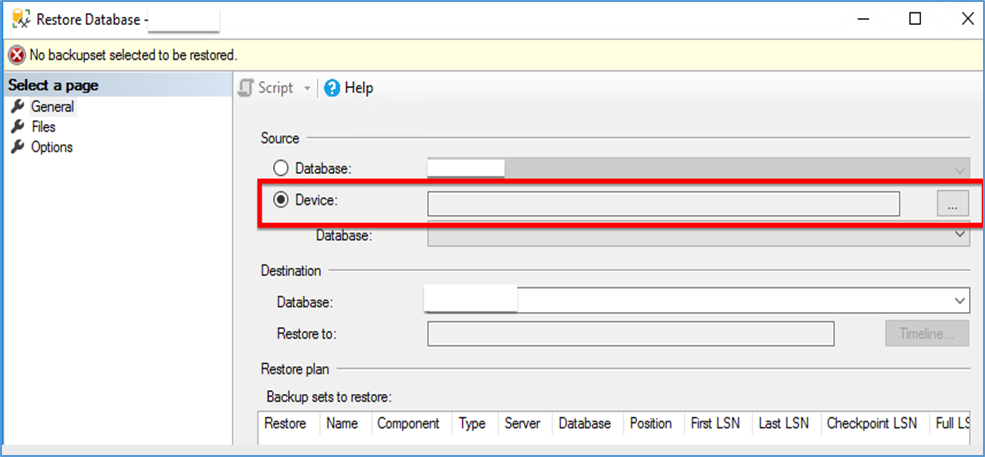
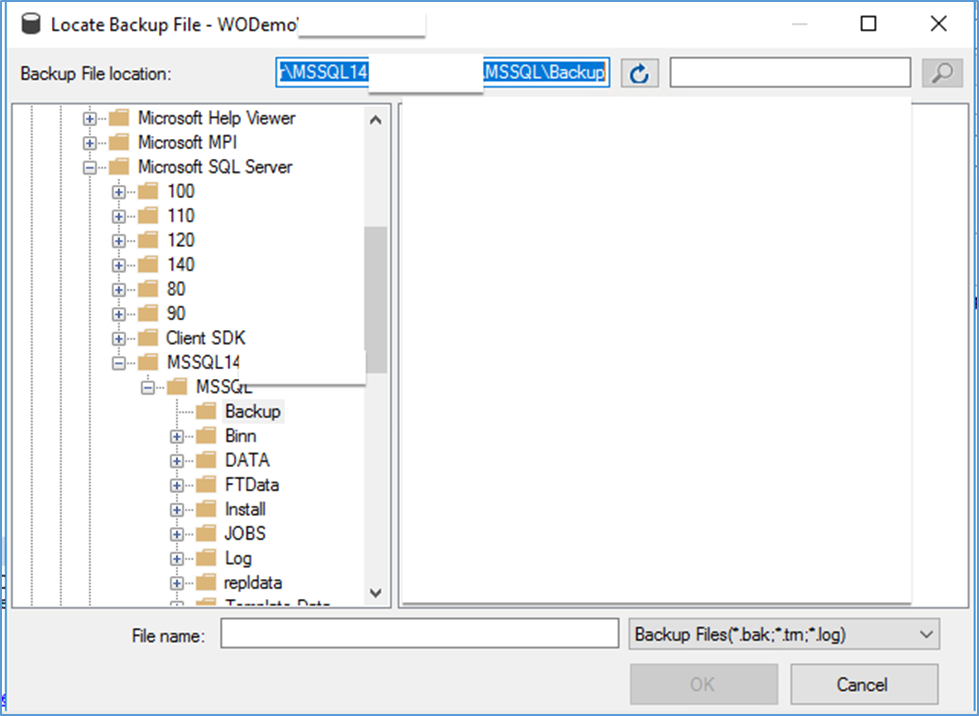
2. Double click on the “Device”.
3. Click on the “Add” to add backup in the database.
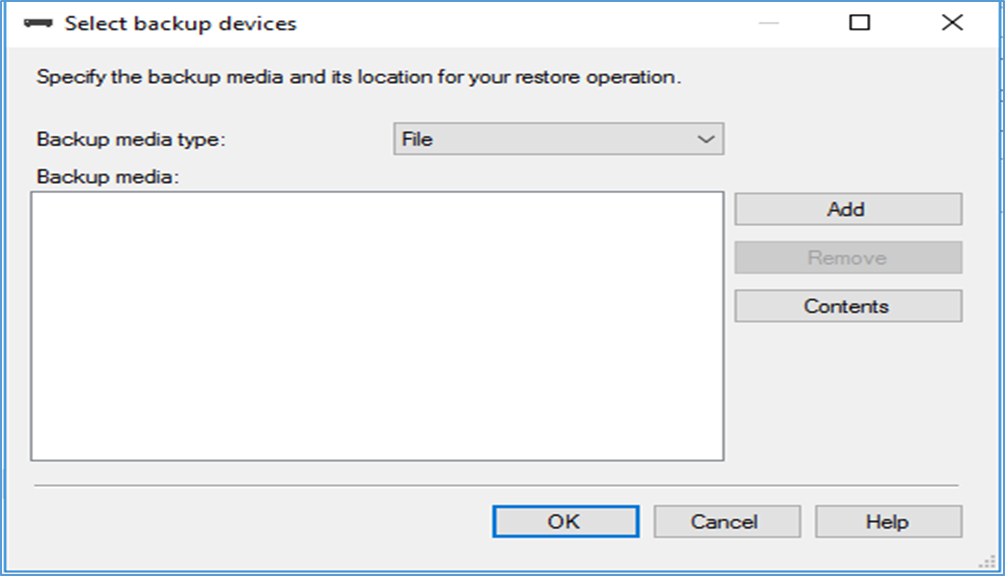
4. Select the backup and then click on OK.
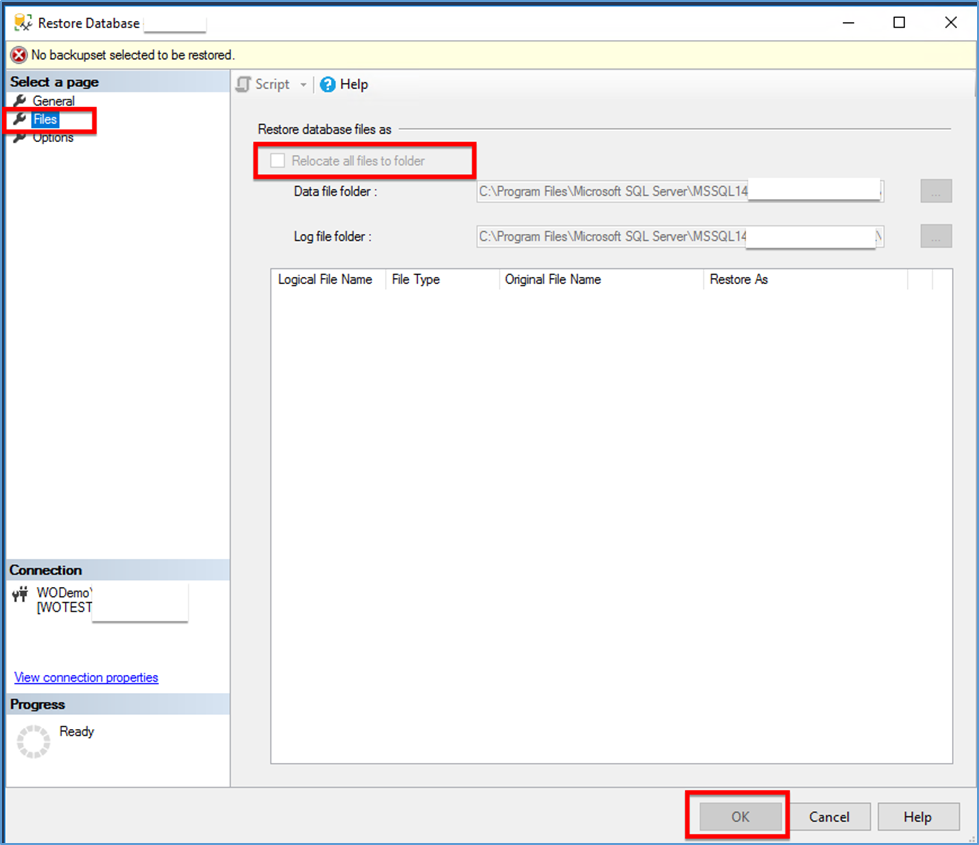
5. Click on “Files” and then select the “RelocateAll files to folder”.
6. Click on Options and then select the “Overwrite the existing database”.
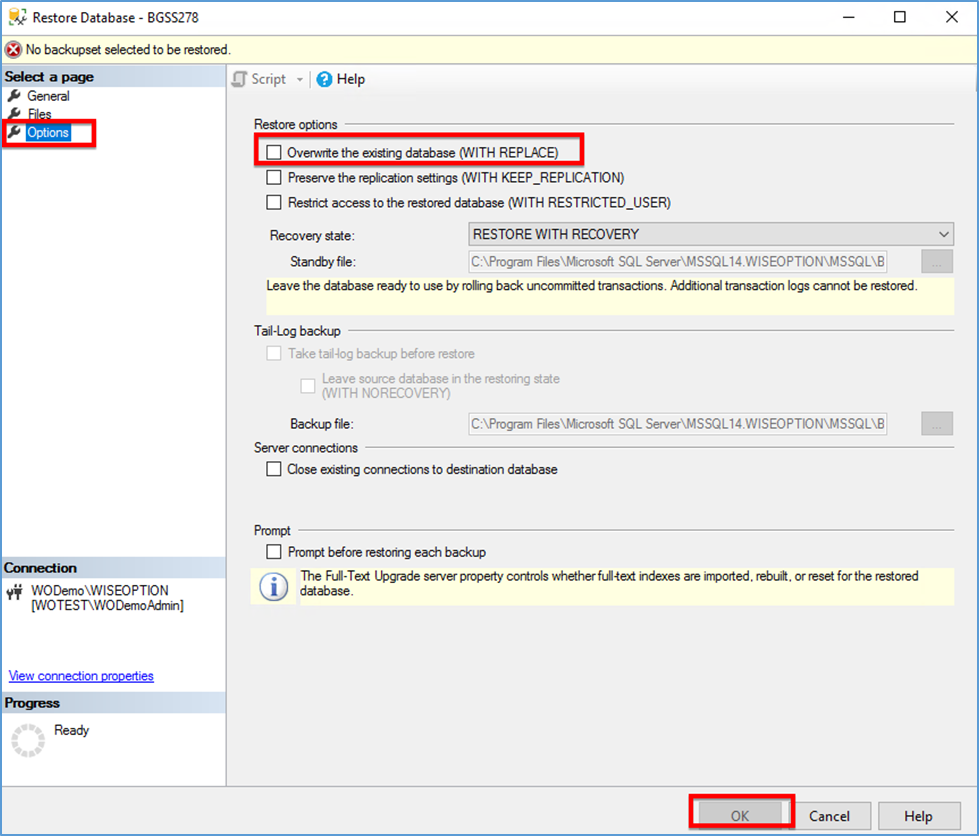
Now you successfully restored the database.