Azure Virtual Machines are software emulations of physical computers that run in the Azure cloud. They offer full control over the operating system, storage, and networking, allowing you to install and run almost any application or service. Azure VMs can be used for development, testing, production workloads, or legacy applications. This article offers a beginner’s guide to Azure Virtual Machines and how to set them up.

How to Set Up an Azure Virtual Machine
Step 1: Access the Azure Portal
- Go to the Azure Portal and log in using your Microsoft account.
- From the dashboard, click “Create a resource” and select “Virtual Machine” under the Compute category.

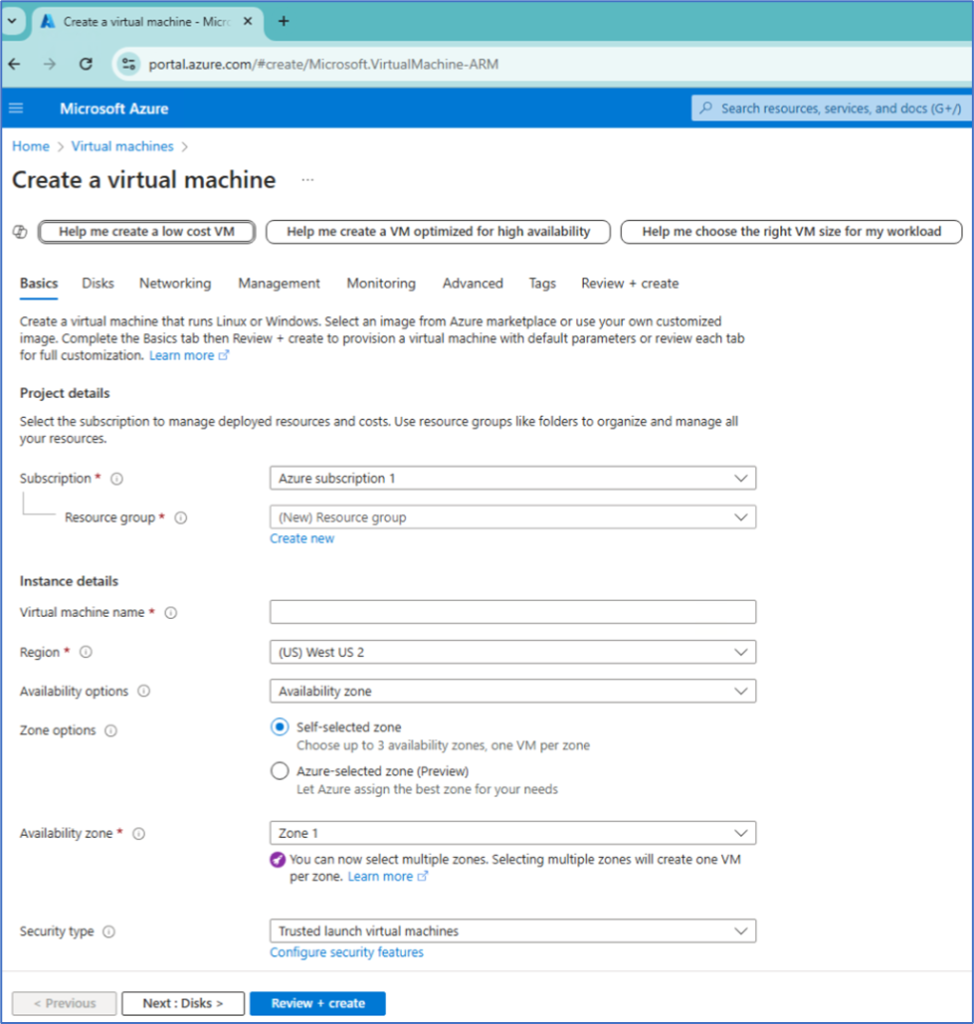
Step 2: Configure the Basics
- Choose your subscription and resource group (or create a new one).
- Select a Virtual Machine Name and choose a Region closest to your target users for low latency.
- Select the operating system you want to run (e.g., Windows Server, Ubuntu).
- Choose the size of your VM based on your performance needs. Azure offers various pricing tiers for CPU, memory, and storage.

Step 3: Configure Networking
- Azure will automatically create a Virtual Network (VNet) for your VM, but you can customize the settings if needed.
- Choose whether to allow Public IP access to your VM. For web servers or remote access, this is essential.
- Configure inbound and outbound port rules to control traffic to your VM.

Step 4: Add Storage and Disks
- By default, Azure provides an OS disk for your VM. You can also add additional disks for data storage.
- Choose between Standard HDD, Standard SSD, or Premium SSD based on your performance needs.

Step 5: Review and Launch
- After configuring your VM, review the summary to ensure everything is correct.
- Click “Create” to launch your VM. The deployment process may take a few minutes.
Managing and Monitoring Your Virtual Machine
Once your VM is running, you can manage it from the Azure Portal. Azure provides several tools for managing and monitoring your VM:
- Azure Monitor: Track the performance and health of your VM.
- Backup and Restore: Create backups and restore points to ensure data protection.
- Resize or Scale: Easily adjust the size and resources of your VM based on demand.


