Insert the Ubuntu install CD / DVD / USB stick into your system and boot from it. When you install the OS in a virtual machine like I will do it here, then you should be able to select the downloaded ISO file as a source for the CD/DVD drive in VMWare and Virtualbox without burning it on CD first. Start the server or virtual machine, it will boot the system and start the installer.
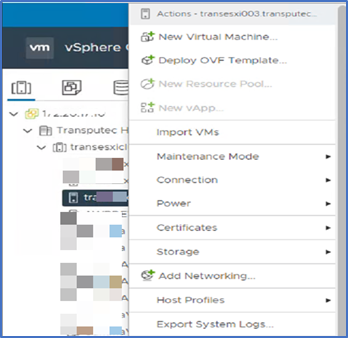
1 – Login on vCenter/vSphere
2 – Select any host where you want to create new virtual machine and right click.
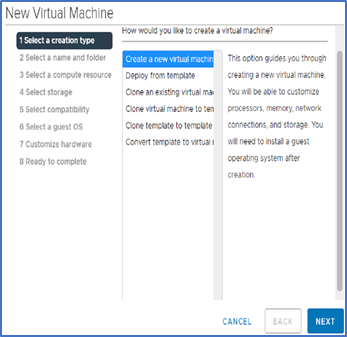
3 – Chose New Virtual Machine
4 – Select Create a new virtual machine and click Next
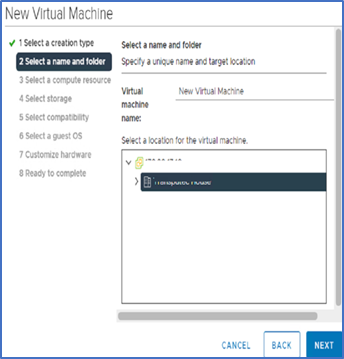
5 – Enter a name for the virtual machine and select/create folder where you want to place that VM and click Next
6 – Select a host for the new VM and click Next
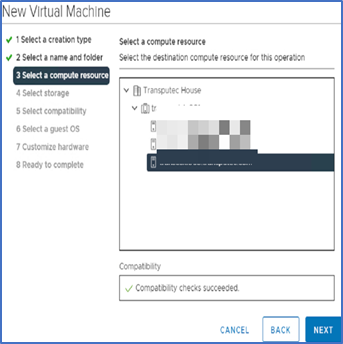
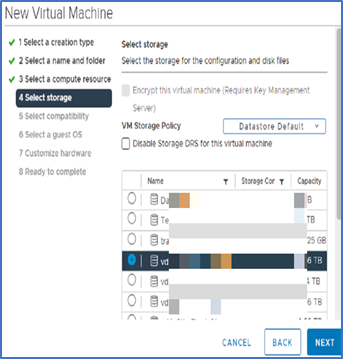
7 – Select storage for the VM and click Next
8 – Keep the default compatibility mode and click Next.

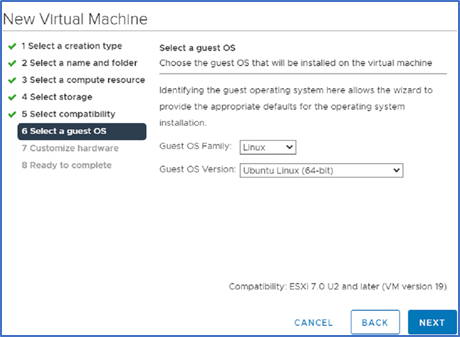
9 – Chose Linux as Guest OS and Ubuntu Linux (64-bit) as OS version and click Next.
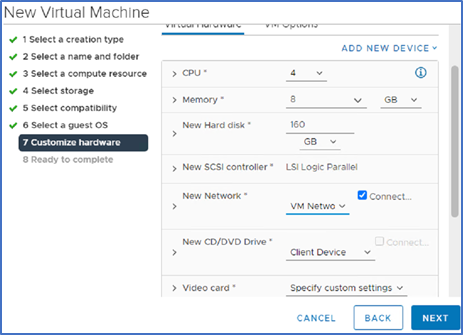
10 – Specify resources for the VM as per your requirements and select ISO image by clicking on Client Device.
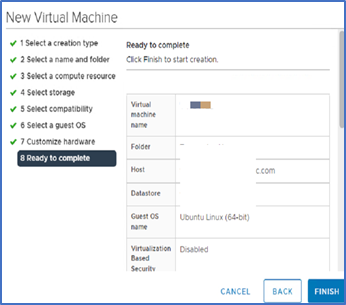
11 – Review summary of all resources assigned to VM and click Finish if you’re satisfied.
12 – The new VM is now available in vCenter. Just right click on that and power on.
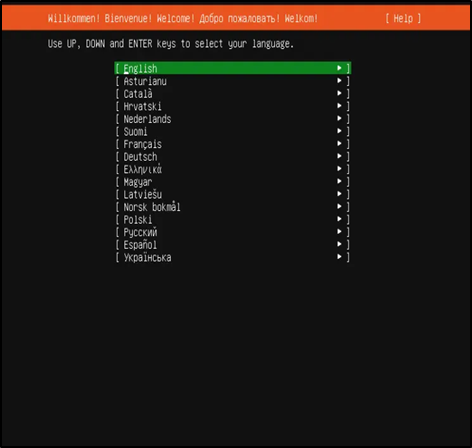
13 – Installation is begin, select your language and hit spacebar to move on next screen.
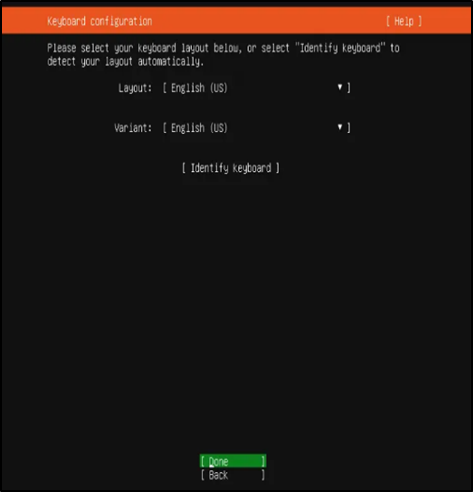
14 – Chose keyboard settings or select done if you want default options.
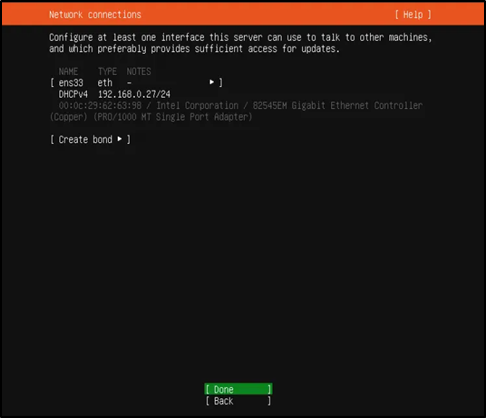
15 – The Ubuntu installer shows now which network card it has detected on the server. The network device name which got assigned automatically is ens33. The IPv4 address has been assigned automatically via DHCP. I will change it later to a fixed IP address when the base system has been installed. If your network has no DHCP server, then you can enter a fixed IP address now by choosing the network card (press Tab until it is highlighted and then press Return).
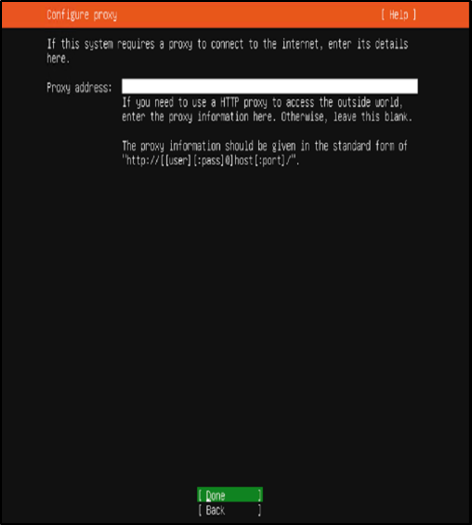
16 – Now you can set a proxy server address in case a proxy is required to access the internet. In my case, there is no proxy required, so I just choose “Done” to go to the next installation step.
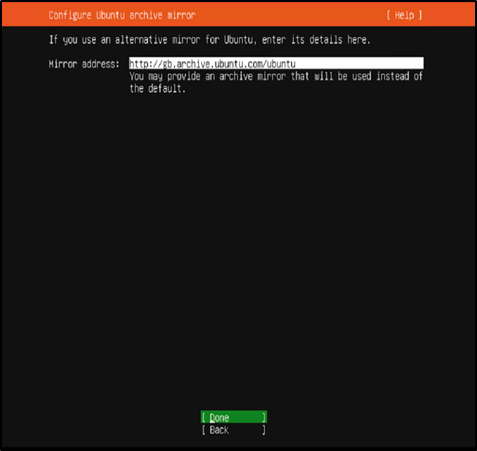
17 – Here you can choose from which Ubuntu mirror server updates and installation files shall be downloaded. I’ll keep the default and go to the next install screen.
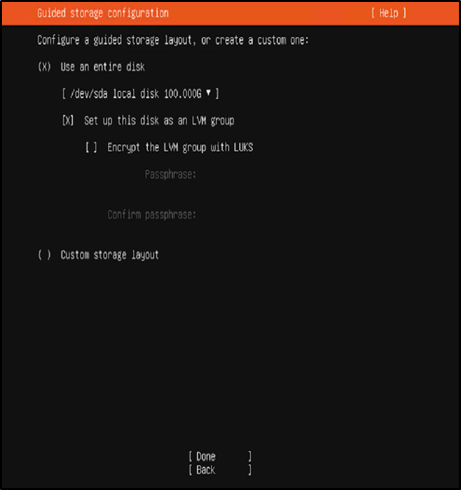
18 – The Ubuntu server installer shows now the hard disks that it has detected in the server. The installation disk is a 40GB HD on /dev/sda here. I’ll choose to use the entire disk for my Ubuntu installation. If you need a custom layout consisting of multiple partitions, choose “Custom Layout” instead and create partitions as needed.
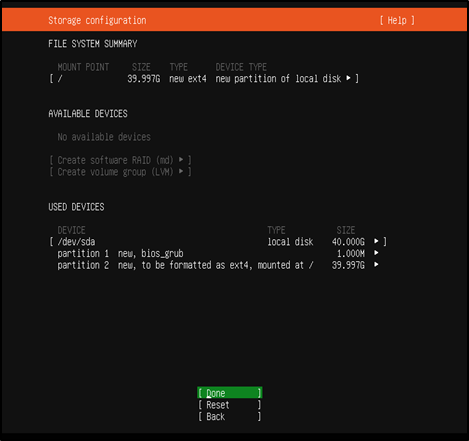
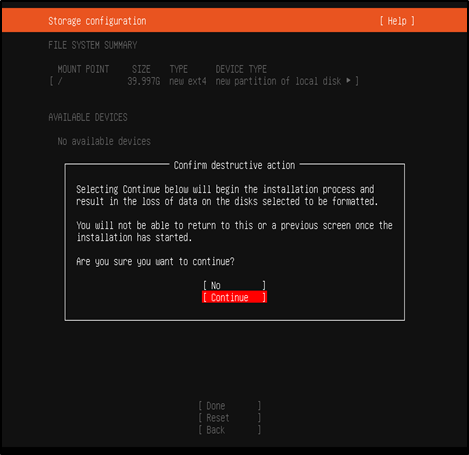
19 – The installer shows the default storage configuration below. It consists of a 1MB bios_grub partition plus one large / partition that will contain the operating system installation. Choose “Done” to proceed to the next screen.
20 – Before the installation starts, the Ubuntu installer requests to confirm the partitioning. Press the “Tab” key until the “Continue” option is highlighted in red, then press “Return” to proceed.
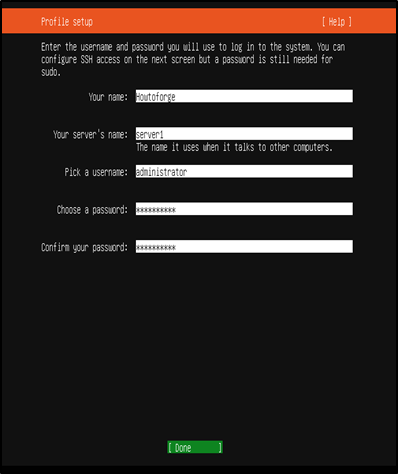
21 – Now it’s time to set the server name (hostname) and the username and password of the administrator. I’ll choose the username ‘administrator’ here just as an example, please use a different and more secure name in your real setup. The Ubuntu shell user that we create in this step has sudo permissions, this means that he is able to administrate the system and to become root user via sudo.
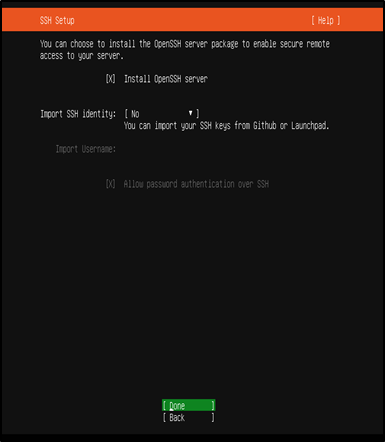
22 – Most Linux servers get administered over the network using SSH. In this step, the Ubuntu installer can install the SSH server directly. Select the checkbox “Install OpenSSH Server” and proceed to the next step.
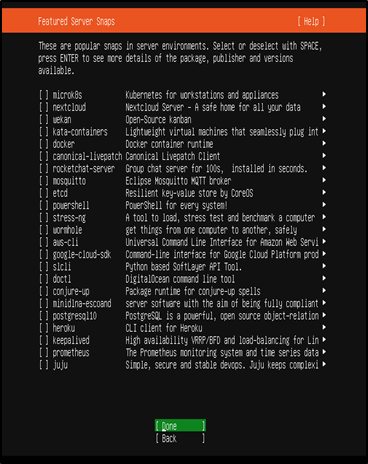
23 – In this step, you can preinstall commonly used services via Snap installer. I do not select any services here as the purpose of this guide is to install a minimal base system. You can install services via apt or snap at any time later.
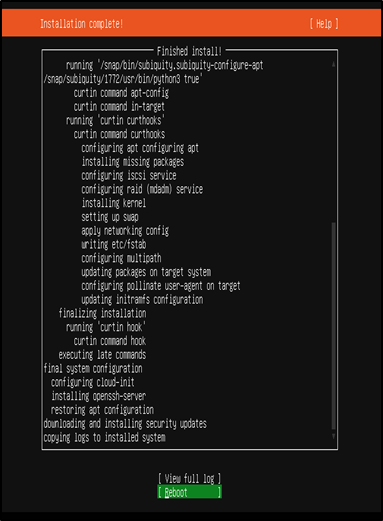
24 – Ubuntu Installation finished successfully. Select “Reboot” to boot the server into the fresh installed Ubuntu 20.04 system.