We need to check the VMware Compatibility Matrix to verify if existing Hardware support upgradation. vCenter Server 7.0 cannot manage ESXi 6 and earlier versions. If we have an existing environment with ESXi 5.0 or 5.5 then first we need to upgrade these hosts and then vCenter.
As VMware didn’t introduced Windows vCenter Server v7.0 so we need to upgrade to vCenter appliance.
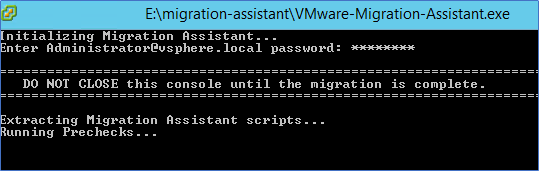
Initially we need to run “VMware-Migration-Assistant.exe” which will check the infrastructure and verify that architecture meets requirements to upgrade and if there is enough free space where we are going to migrate.
Before starting the vCenter Server to appliance migration.
- Take backup of vCenter on Windows to revert back if something goes wrong
- Sync the clock between all machines
- Current ESXi environment should have version 6.0 or higher
Below are the following steps which will guide us to complete the vCenter migration
Mount the VCSA 7.0 ISO image
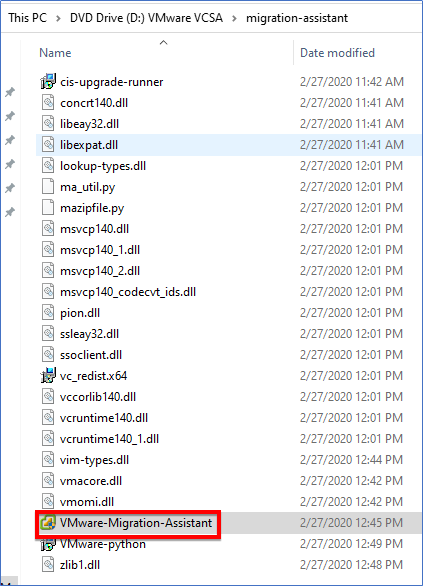
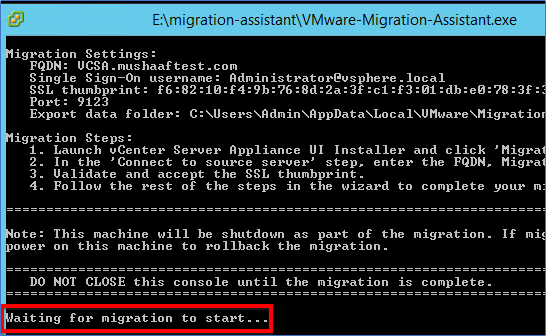
Go to Migration Assistant Folder and Run “VMware-Migration-Assistant.exe” as administrator.
Enter vCenter Administrator password. This will run the commands and test prechecks of migration.
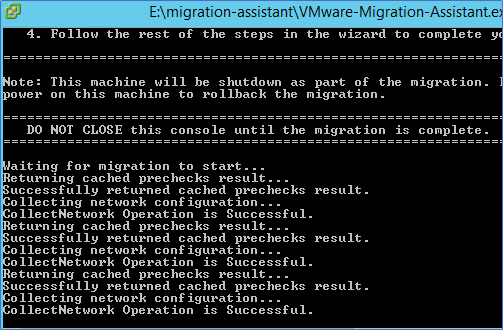
Once we get the message “Waiting for migration to start” then run the Installer from ISO
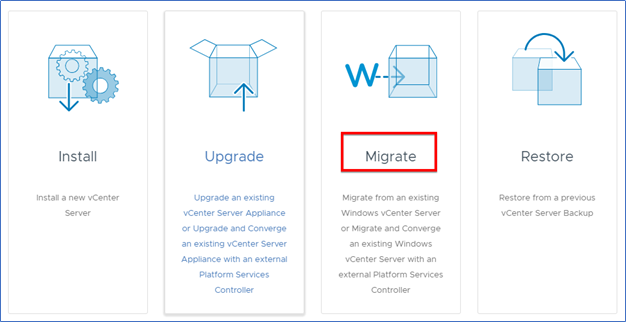
Right click on “Installer.exe” and Click on Migrate
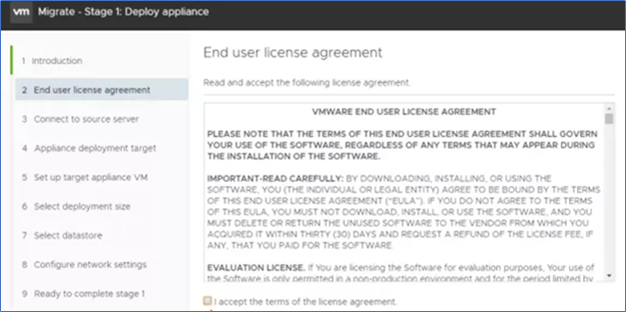
Accept End user license agreement and Next
Enter the Source server info and click Next
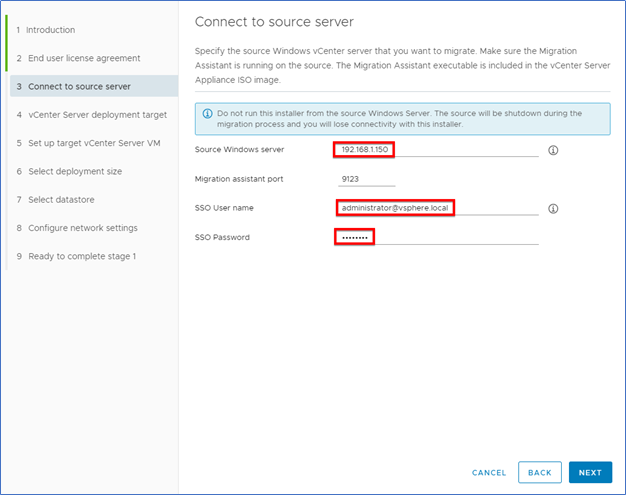
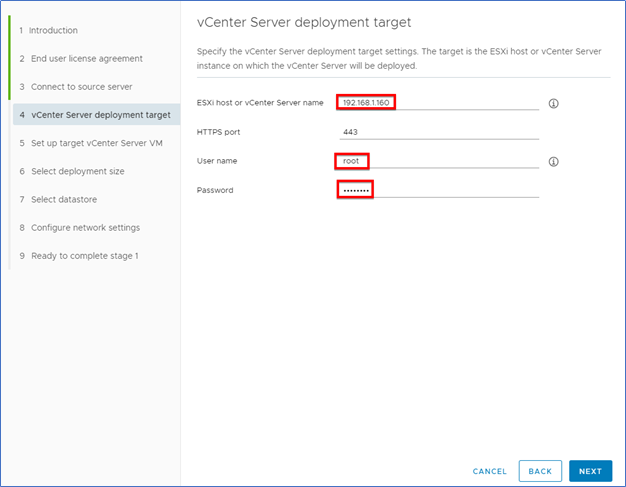
Click on Yes to accept the SSL Certificate and enter the Destination Host info.
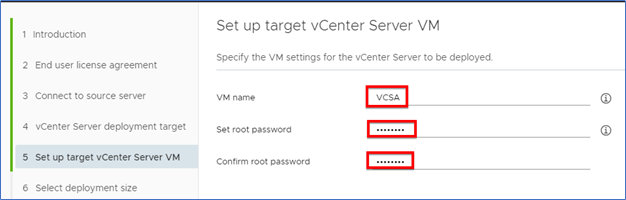
Accept License agreement again and Set Target vCenter info
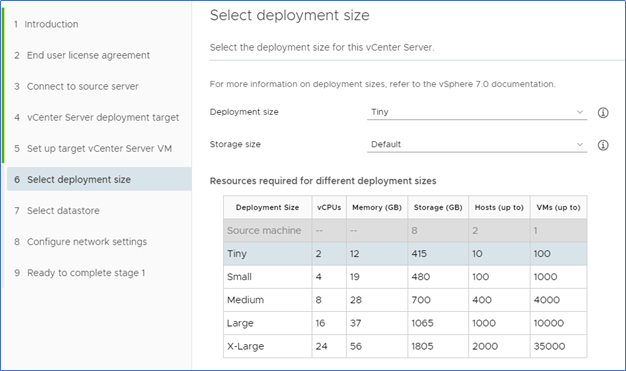
Select the Deployment size and click Next
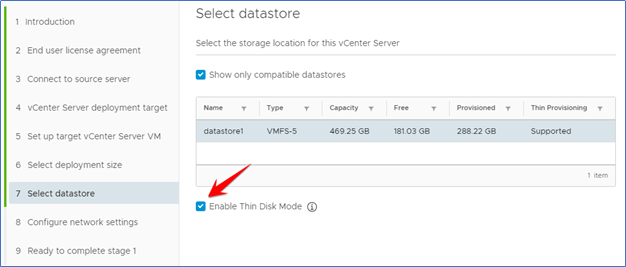
Select the Datastore and make sure to enable Thin Disk mode
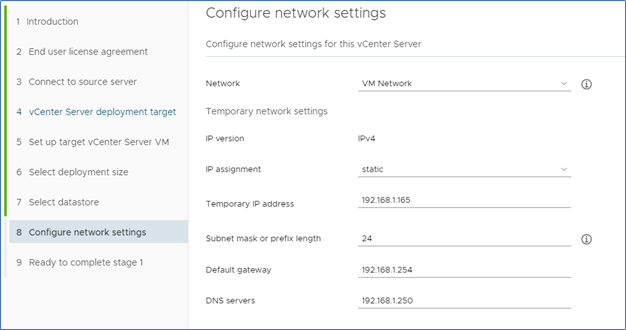
Configure Network info and click Next
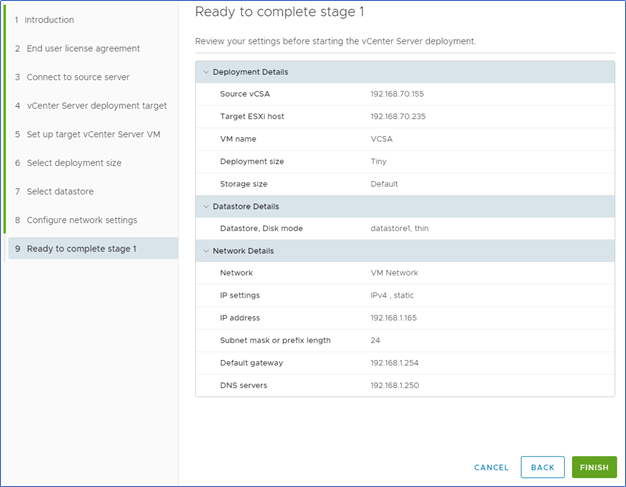
Finally, review the Summary and click on Finish
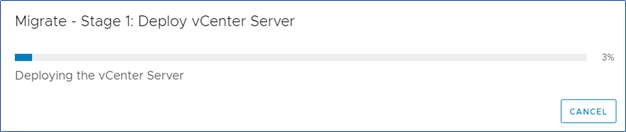
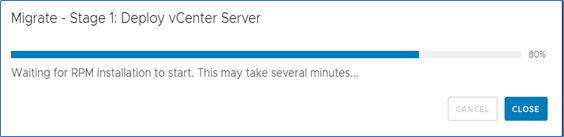
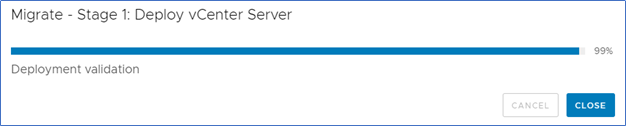
As migration has been started and this will take few minutes to complete.
We can also check the status from old vCenter as below
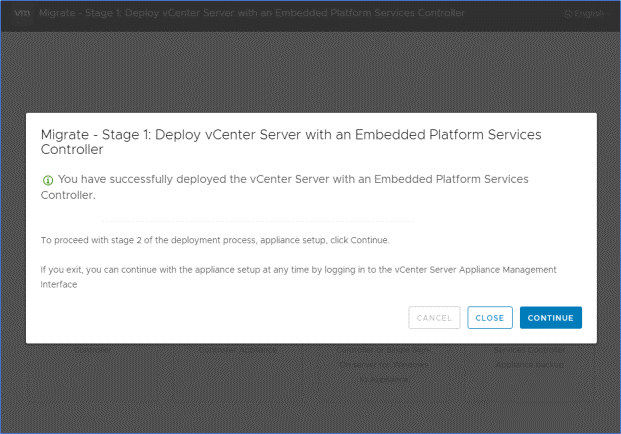
After completing the stage 1 Click on Continue
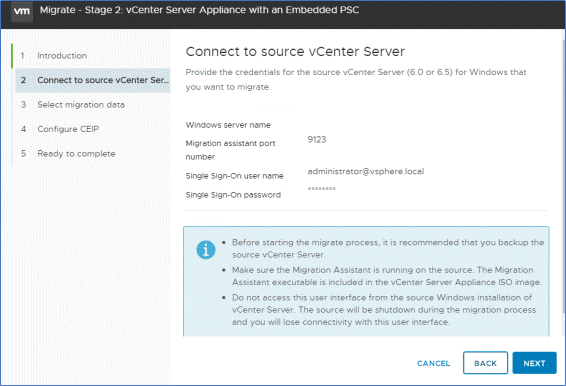
Enter the credentials of vCenter Server
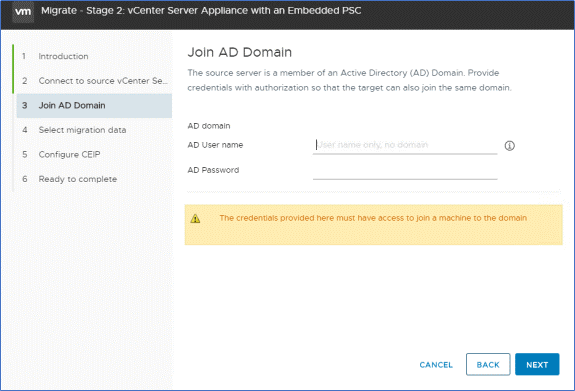
Provide Active Directory Domain and credentials
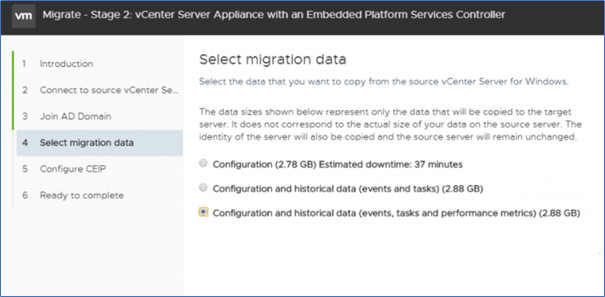
Select the Migration Data you want to migrate
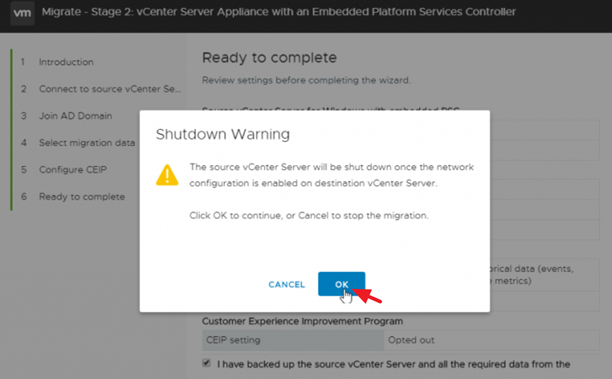
Click on Finish and Old vCenter will be shutdown automatically
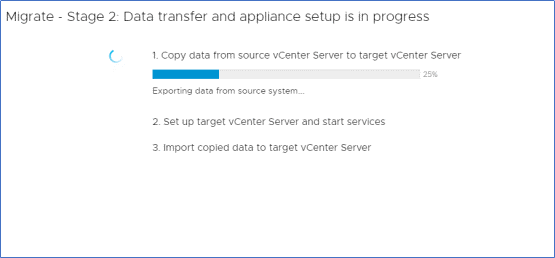
his will take sometime to copy the data
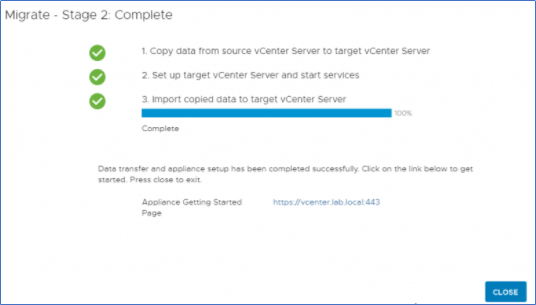
And final screen will show that migration has been Completed.
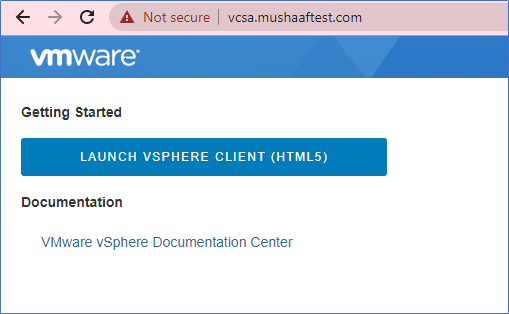
Access the vCenter by FQDN name