


Scan Email Setup allows users to send scanned documents directly from a printer to an email address, eliminating the need for manual file transfers. This feature enhances efficiency by streamlining document sharing in workplaces. Access the printer’s settings through its control panel or web interface to configure it. You’ll need to enter email server details (such as SMTP server, port, and credentials) to enable email sending. Additionally, you can save frequently used email addresses on the printer for quick access. Once set up, users can easily scan and email documents with just a few clicks.
Requirements:
- Working Email Address (with a password if needed)
- SMTP Server Address Details
- SMTP Port Number Details
STEP 1: Login as Administrator and go to [Network Settings] > [Email Settings] > [Email TX (SMTP)].
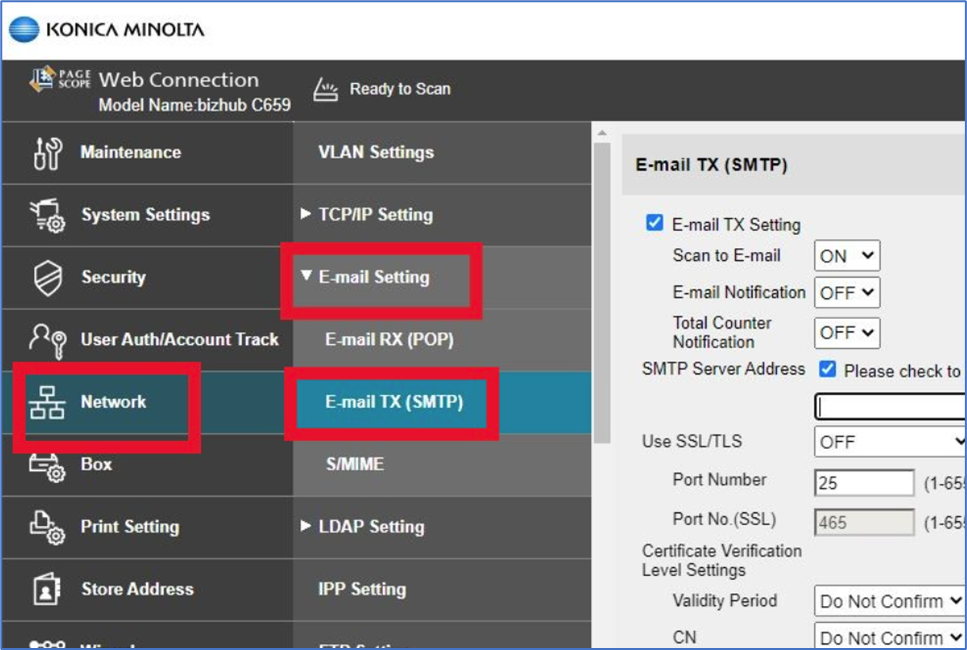
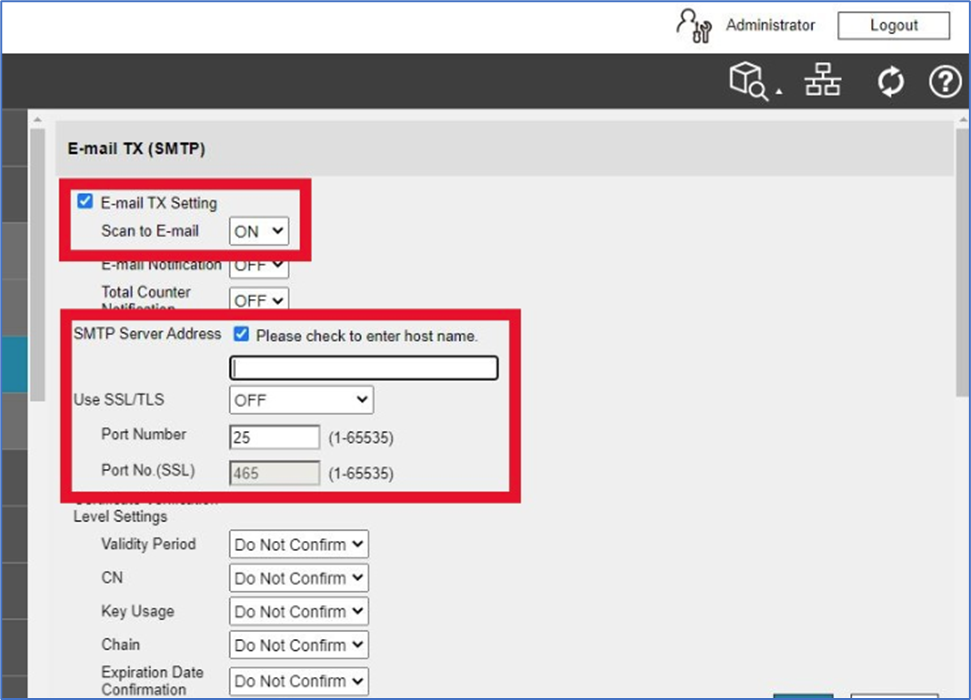
STEP 2: Turn ON the [Scan to Email] Option, enter the [SMTP Server Address], select SSL/TLS (if needed), and enter the SMTP Port Number.
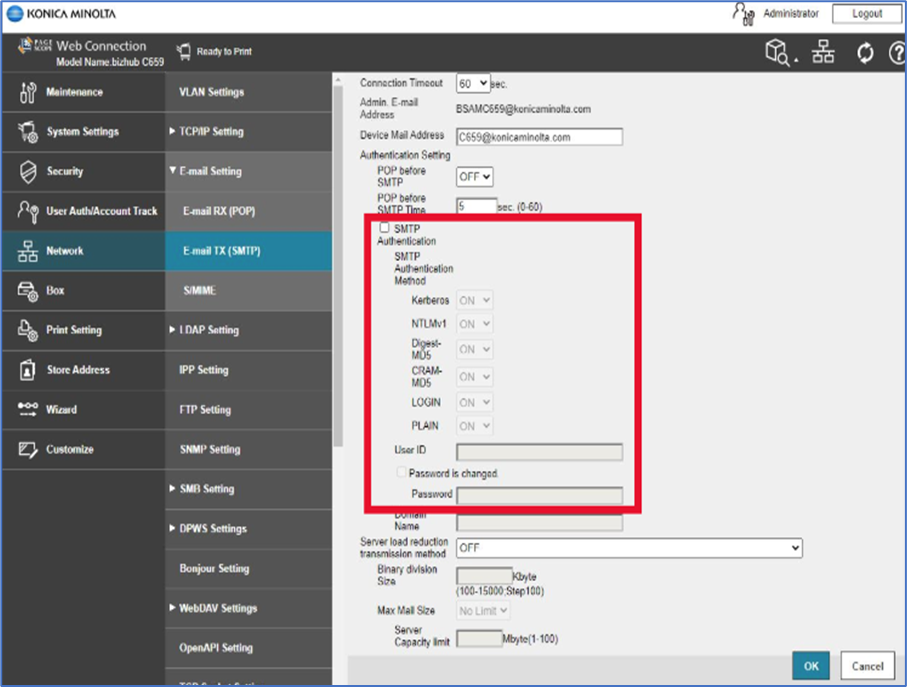
STEP 3: If authentication is needed for the email address, Turn ON the [SMTP Authentication] and enter the email address user ID, and password (if needed). Click OK to save the settings.
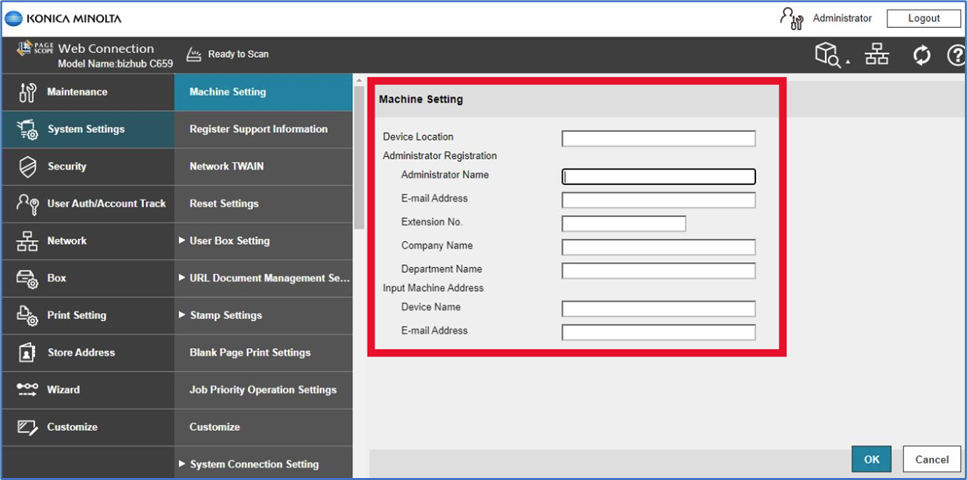
STEP 4: Go to [System Settings] > [Machine Settings] and enter the admin and machine email address same as the email address that was entered on the Email Settings. Click OK to save the settings.
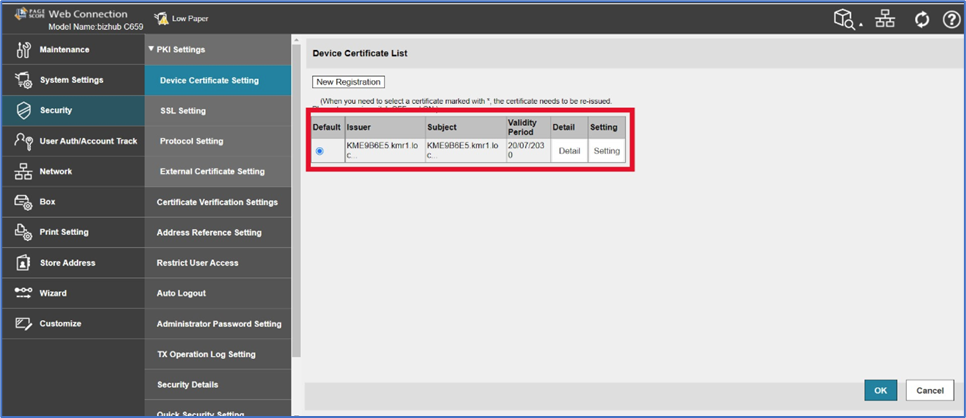
STEP 5: If the email address is using SSL/TLS (port 587 or 465), make sure that the machine has a certificate. To check this go to [Security] > [PKI Settings] > [Device Certificate List]. Make sure that the certificate is still valid according to the Validity Period.
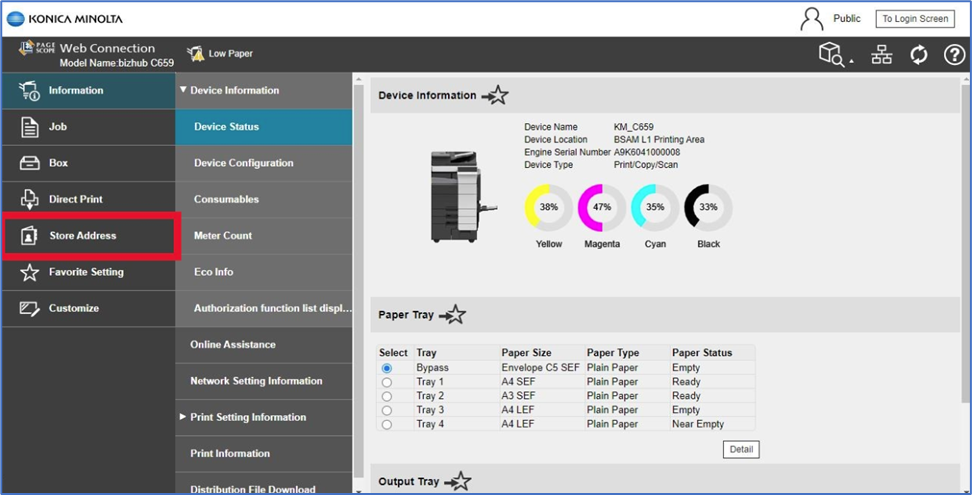
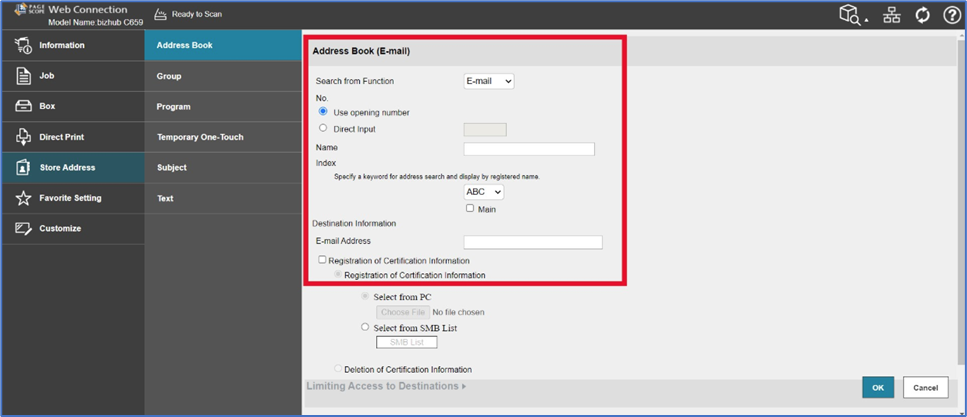
STEP 6: Once done log out as administrator, log back as [Public User], and go to [Store Address] to add the recipient’s email address to the machine address book. Go to [Store Address] > [Address Book] > [New Registration] > select [Email] on the Search from Function and key in the following details:
- Name: Set a name that will show on the Address Book
- Index: Set the index according to the first letter of the Name
- Main: Tick (to show on the Favorites tab)
- Email Address: Enter the recipient’s email address
That’s it! You can now test the Scan to Email function.