built on three key pillars: Advanced protection, simplified security, and preventative defense.
TLS 1.3 and HTTPS are enabled by default on Windows Server 2022. Typically, this protects clients’ data connecting to the server and eliminates obsolete cryptographic algorithms. It also enhances security over older versions and aims to encrypt as much of the handshake as possible.
DNS Client in Server 2022 now supports DNS-over-HTTPS (DoH) which encrypts DNS queries using the HTTPS protocol.
New improvements to Windows Admin Center to manage Server 2022 include capabilities to both reports on the current state of the Secured-core features.
HotPatching – A new way to install updates on new Windows Server Azure Edition virtual machines (VMs) that doesn’t require a reboot after installation
Several platform improvements for Windows Containers, including application compatibility and the Windows Container experience with Kubernetes.
Microsoft Edge is included with Windows Server 2022, replacing Internet Explorer.
How to install Windows Server 2022
Server 2022 Hardware Requirments
Before we dive into the installation, let’s look at the minimum hardware/system requirements for installing Windows Server 2022 operating system.
- Processor: 1.4 GHz 64-bit processor Compatible with x64 instruction set. Supports NX and DEP, CMPXCHG16b, LAHF/SAHF, and prefetch.
- Memory/RAM: 512 MB (2GB for Server with Desktop Experience installation option). ECC (Error Correcting Code) type or similar technology, for physical host deployments
- Disk Space: Minimum 32 GB (Windows Server 2022 using the Server Core installation option).
- Network Requirements: An Ethernet adapter capable of at least 1 gigabit per second throughput. Compliant with the PCI Express architecture specification
- Additional requirements: UEFI 2.3.1c-based system and firmware that supports secure boot; Trusted Platform Module; Graphics device and monitor capable of Super VGA (1024 x 768) or higher resolution.
Server 2022 Installation Options
- Server Core – In many cases, this is the recommended installation option. Server Core is a smaller installation that includes the core components of Windows Server and supports all server roles. However, it doesn’t include a local graphical user interface (GUI). It’s mostly used for remotely managed deployments usually through PowerShell, Windows Admin Center, or other server management tools.
- Server with Desktop Experience – If you want a complete installation, including a full GUI, this is your option. This option has a larger footprint than server core. It is the most preferred option by organizations.
Step 1. Download the Windows Server 2022 ISO
The first and most crucial step in installing the new Windows Server 2022 is acquiring the installer file. This file is an ISO that contains the identical content of an optical disc. This file will allow you to create a boot media and then install your new server operating system.
- To get the Windows Server 2022 ISO image, you first need to sign up at Microsoft’s official Windows Insider page. Navigate to this webpage in any browser of your choice.
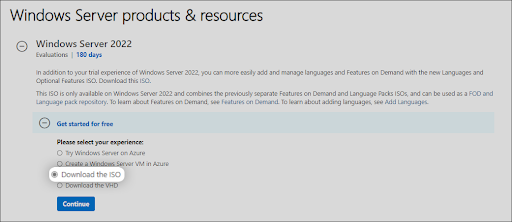
- Click on Windows Server 2022, and then select Download the ISO from the available options. Click Continue.
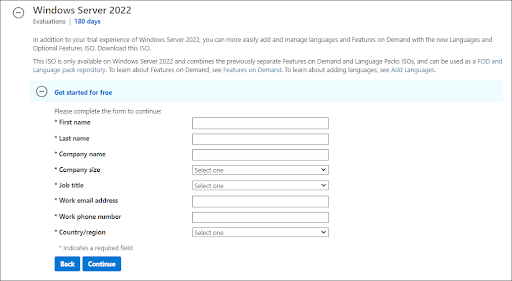
- You’ll be required to fill in your information to be eligible for downloading the Windows Server 2022 ISO image. Make sure to enter your information accurately, as verification may be required later. When done, click Continue.
- Choose the language you want to use when installing Windows Server 2022. You can currently choose from 8 different languages, including English, Spanish and Japanese. Once selected, click on the Download button.

- The download may take up to a couple of hours to complete. Ensure you don’t disconnect your computer from power or the internet while the process is happening, or else it may be lost!
Step 2. Make the bootable ISO image for Windows Server 2022
After successfully downloading the Windows Server 2022 ISO file, it’s time to prepare your boot environment. You can either install Windows Server 2022 on a physical host or virtual machine using an ISO image.
Follow one of the relevant guides by Microsoft to create your bootable media:
If you have access to MSDN (via Visual Studio Subscriptions and Benefits), you have the option to download Windows Server 2022 ISO from there. All you have to do is generate a new key by clicking Get Key and using this for activation of your installation of Windows Server 2022.
Step 3. Install Windows Server 2022
With the boot media ready, you can now proceed to install Windows Server 2022. As it is an extensive operating system with many editions available for purchase or download, your company may want to choose which edition to install before beginning the process and installing the desired edition properly!
You can pick from the following editions when using the latest Windows Server 2022:
- Windows Server 2022 Standard
- Windows Server 2022 Essential
- Windows Server 2022 Datacenter
As you may know, each version has different strengths, features, and prices. When thinking about licensing, keep in mind that all editions of Windows Server 2022 require a legal license in order to use. Now, let’s get on with the installation process. Continue with the approach you prefer between Server Core and Desktop Experience.
Step 3.1 Installing Windows Server 2022 (Server Core)
If you want to install Windows Server 2022 using Server Core, follow the instructions in this section. Server Core is a minimal installation method that uses a Command Prompt to handle commands on the server. It’s suitable for smaller businesses that need to save space and resources.
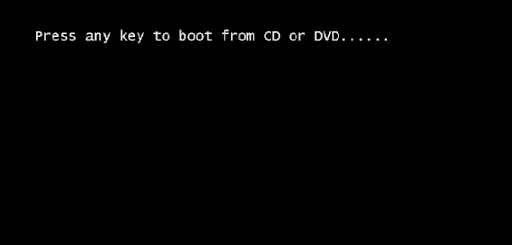
- Power on your physical or virtual machine using the boot media you created. You’ll be asked to press any key when it asks for an input, which is used as a launching point for installing Microsoft’s newest server operating system.
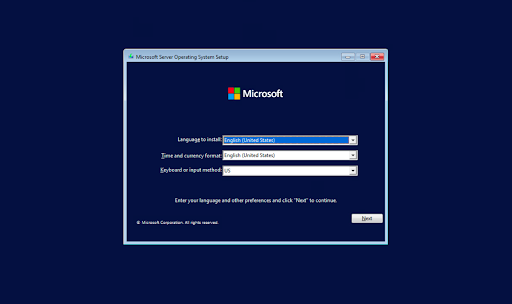
- Next, you’ll need to select a language of your choice, as well as keyboard layout preference and your time/currency settings. Click “Next” in the window that pops up, and let’s get started!
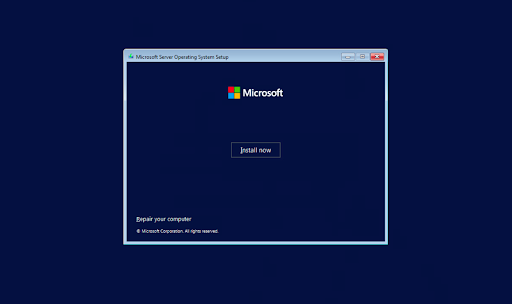
- Click on the Install now button to initiate the installation process for Windows Server 2022. This will begin the installation of the Server Core edition of Microsoft’s server platform.
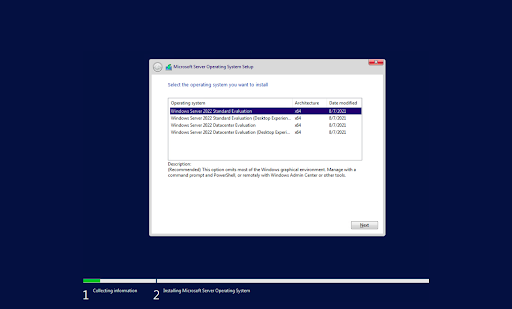
- In the next window, choose the Windows Server 2022 server option you want to install with Server Core that gives you access and use for some of Microsoft’s powerful command-line tools. Click Next to proceed.
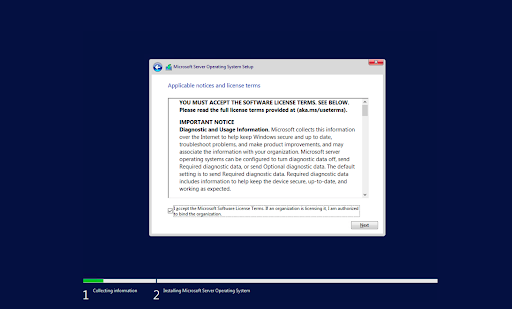
- Next, you need to read the License terms and agree to them for the installation process to continue by checking the “I accept all license agreements” box.
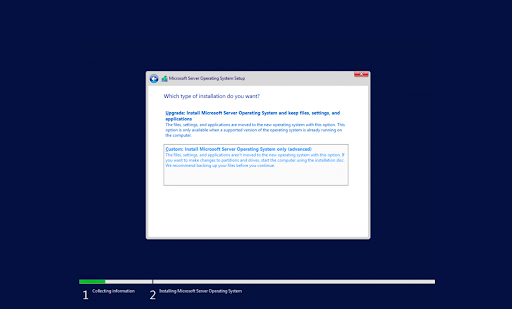
- When installing, select “Custom: Install Windows Server Operating System only” if you’re installing the OS on a fresh server. Otherwise, if upgrading from a previous version of Windows Server, choose the “Upgrade: Install Microsoft Server Operating System and keep files, settings, and applications” option.
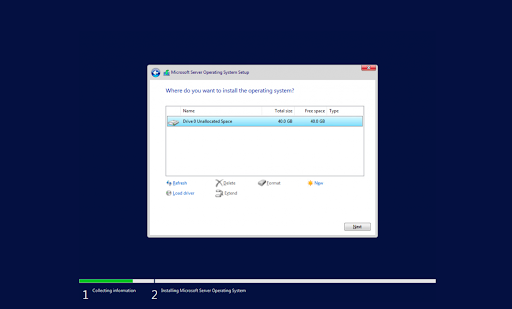
- Select a partition to install Windows Server onto. You can optionally create a new partition or use the entire drive size. When done selecting the designated OS partition, proceed by clicking “Next.”
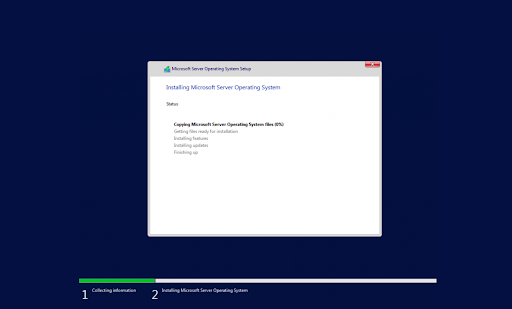
- The installer will begin installing the necessary system files. You’ll see when it’s completed, and the system reboots automatically.
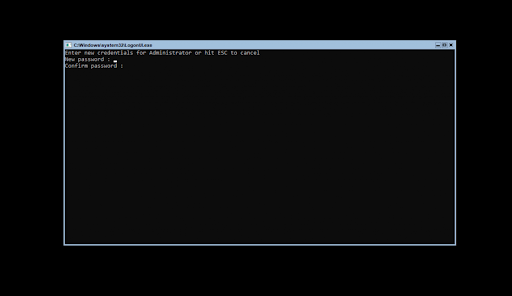
- After a successful installation, the system should immediately reboot and prompt you for an administrator password. Enter this information before re-entering it once again to verify it, and then continue.
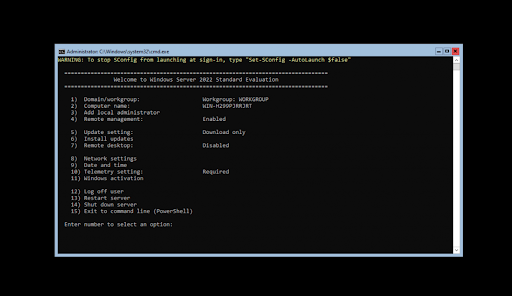
- Next, you’ll be taken directly into Microsoft’s PowerShell interface, where you can begin managing your newly installed Windows Server 2022 operating system via the Server Core interface.
Step 3.2 Installing Windows Server 2022 (Desktop Experience)
If you want to install Windows Server 2022 using Desktop Experience, follow the instructions in this section. The Desktop Experience installation has a dedicated GUI (Graphical User Interface) similar to a regular Windows operating system, making server management easier.
- Follow the same instructions as the Server Core installation until your system restarts after installing the operating system. Also, make sure to select Desktop Experience when choosing your Windows Server 2022 version.
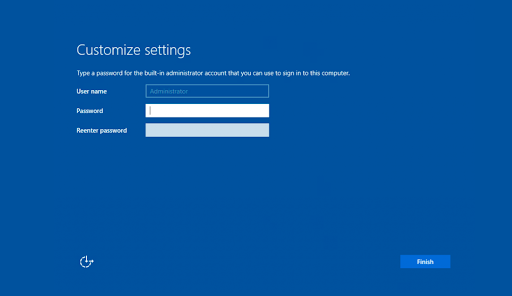
- After your system restarts, you’ll be greeted with a graphical interface. You’ll be prompted to create an administrator password before you can proceed. Click Finish when you’re done.
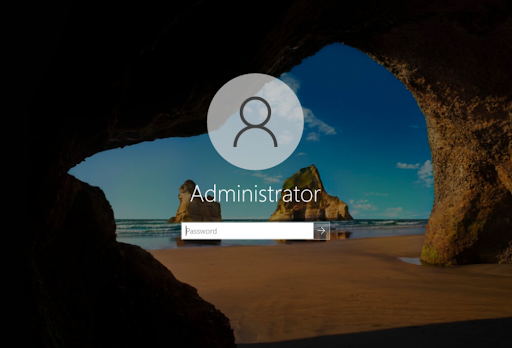
- The login screen will appear when you press Ctrl + Alt + Del. Enter the password set in the previous step to continue accessing your server.
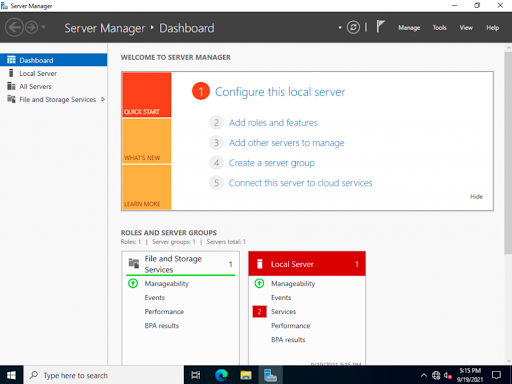
- You should see the Server Manager launch by default. You can begin configuring your server here or explore more options in the Control Panel accessible in the same way as it is on regular Windows operating systems.
Step 4. Configure your network on Windows Server 2022
The previous sections covered how to install Windows Server 2022, but now it’s time for configuration. The first things that need configuring on your network are IPs and gateway addresses so that system admins can manage the server remotely and reach other parts of their environments, including internet-based services.
Step 4.1 Network configuration on Windows Server 2022 Server Core
The instructions below will help you configure the network if you installed Windows Server 2022 with a Server Core installation.
- To configure the network for Windows Server 2022, run the following command in the Command Prompt area:
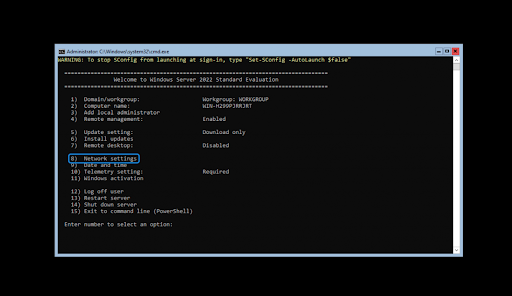
SConfig - You’ll see a menu open on the screen. Choose option 8 for Network Settings. You’ll be taken to your network configuration page, where all of these adjustments are made for both wired and wireless networks!
- To begin configuration, you need to select which IP to configure first. In this example case, we’ll choose 1 since our server has only one network connection. Normally, you might see multiple options here — select the one you want to work with first.
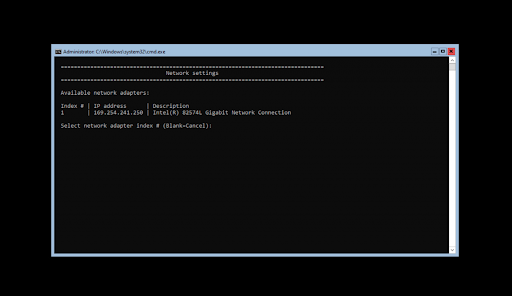
- Once you have selected your IP for configuration, you can begin customizing your settings. The computer’s network settings will be automatically updated. The process should take no more than five minutes to complete.
Step 4.2 Network configuration on Windows Server 2022 Desktop Experience
The instructions below will help you configure the network if you install Windows Server 2022 with a desktop experience.
- Open the Search interface in your taskbar by clicking on the magnifying glass icon. You can also bring it up with the Windows + S keyboard shortcut.
- Type in the words Control Panel and click on the first matching search result. When it opens, navigate to Network and Internet > Network Connections.
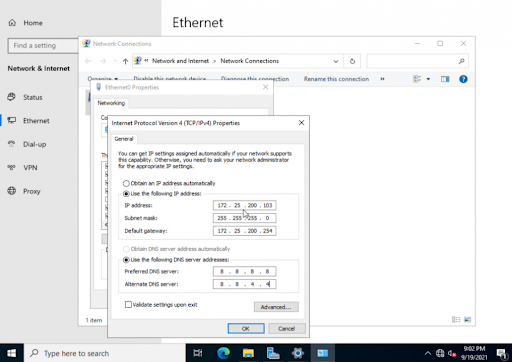
- Right-click on the network you want to configure. We only have one network connection to the server computer in our example; however, you may see many possible options. Pick whichever you want to configure, and choose Properties from the context menu.
- You can begin configuring the network connection using the GUI, which resembles Windows 10’s.
How to install Server 2022 Updates
- Click Start > Settings
- Select Update and Security.
- Click Check for Updates.
- Now you should see the latest updates available for your Server 2022.
- Click Install Now to begin the installation of updates.


