Introduction
In this guide, we a going to install and configure a DHCP Server in the new Windows Server 2019
Step 1: Server Manager
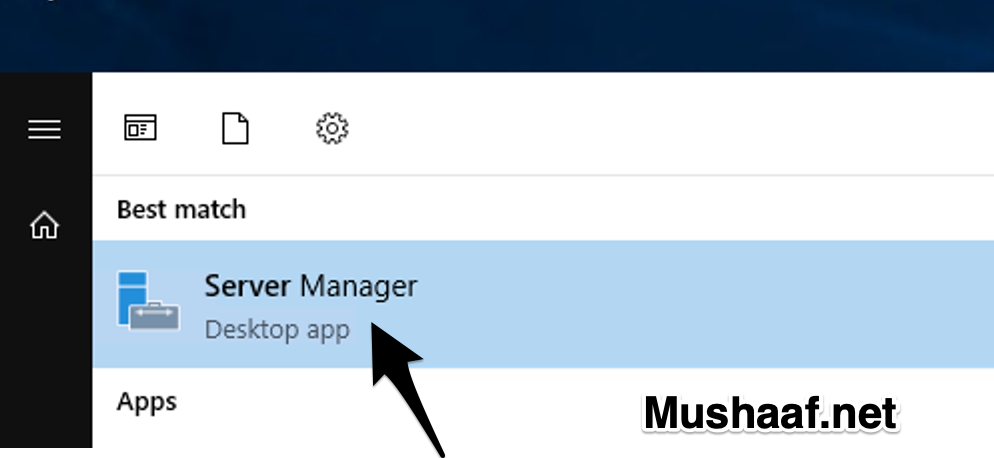
The first step is to open up “Server Manager” so that we can start the installation process. Hit your “Windows” button and type in “Server Manager” and choose the app that brings itself up. Once it is opened, proceed to step 2.
Step 2: Add Roles and Features
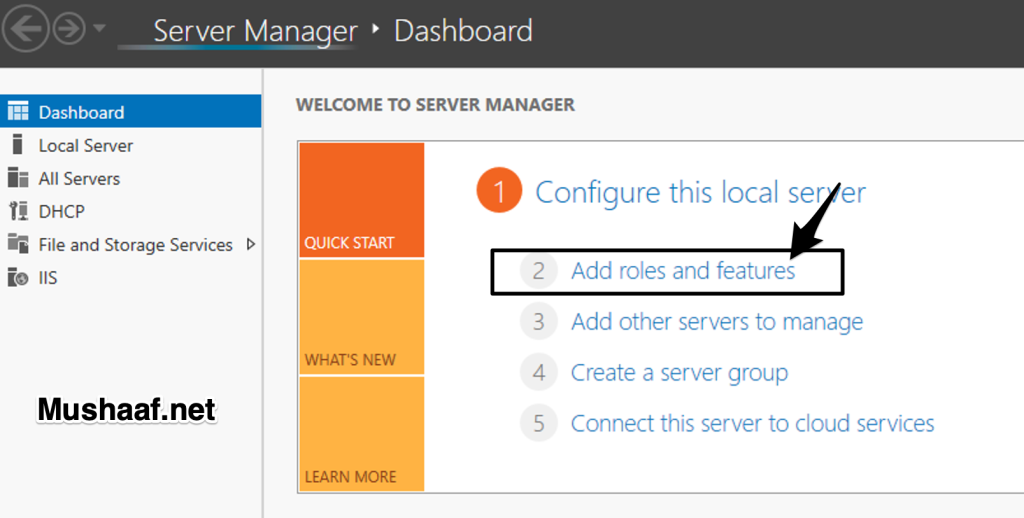
On your “Server Manager” window, click on “Add Roles and Features“. This will bring up a pop-up window. Click “Next” on that pop-up
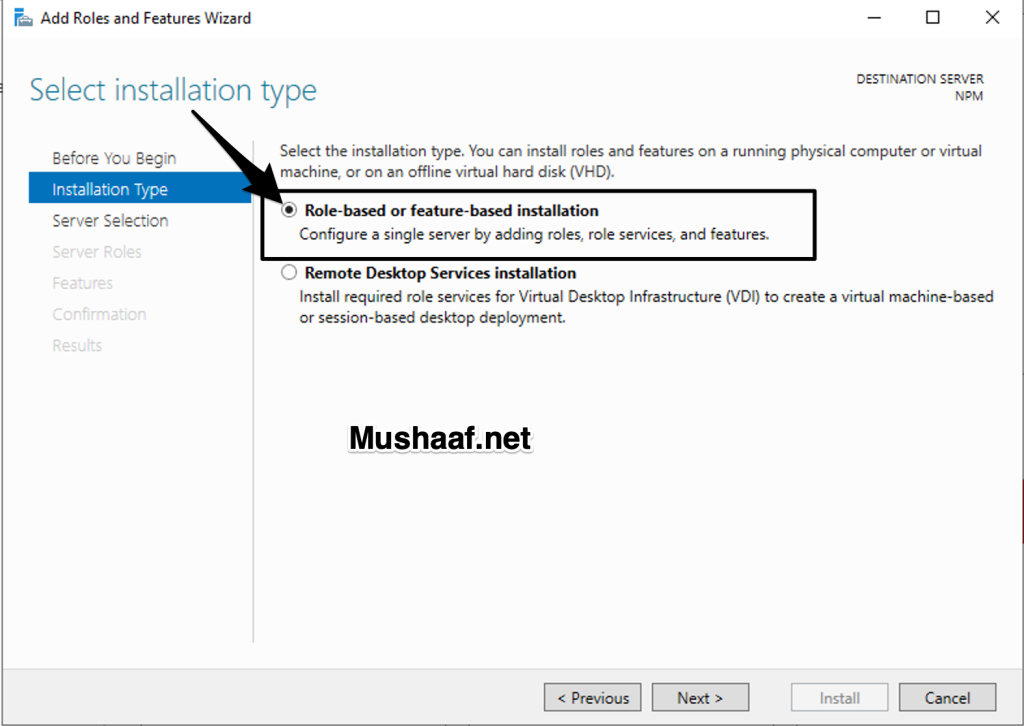
Step 3: Role Based or Feature based installation
On this page, choose the “Role Based or Feature based installation” radio option and hit “Next“.
Step 4: Choose Host
On this page, choose the server you would wish to install the DHCP Server on. On this guide, we are choosing the local server. Click “Next” after that.

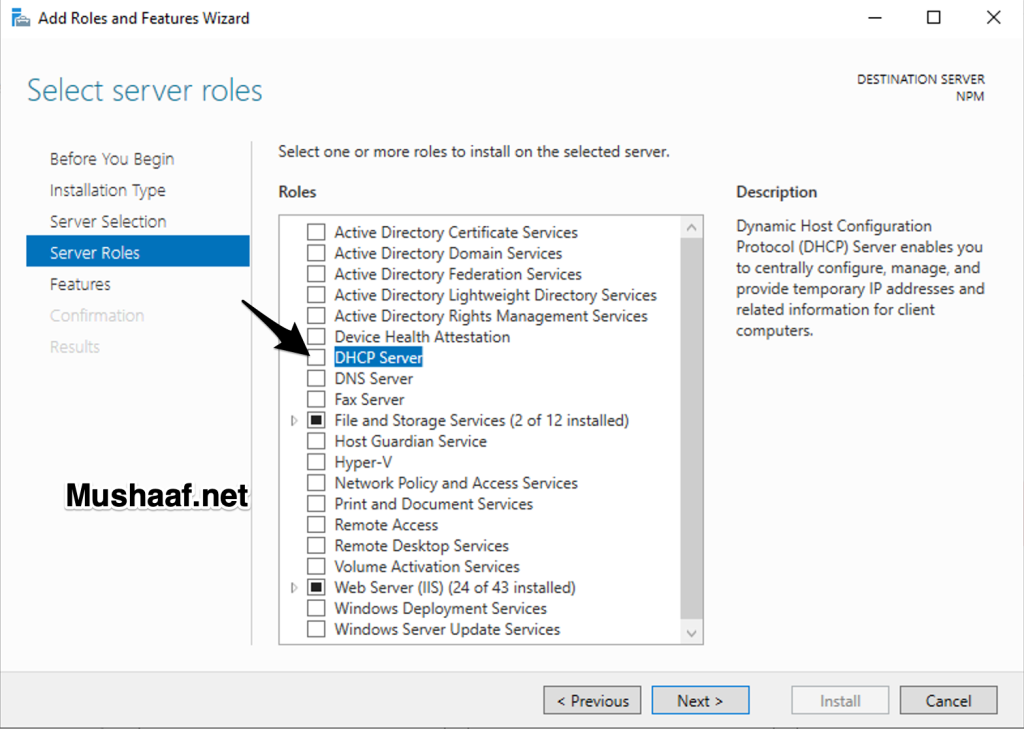
Step 5: Select Server Roles
This next page is titled “Select Server Roles” and has got a list of roles to install. As you can guess, we are going to choose “DHCP Server“. Please go ahead and choose it.
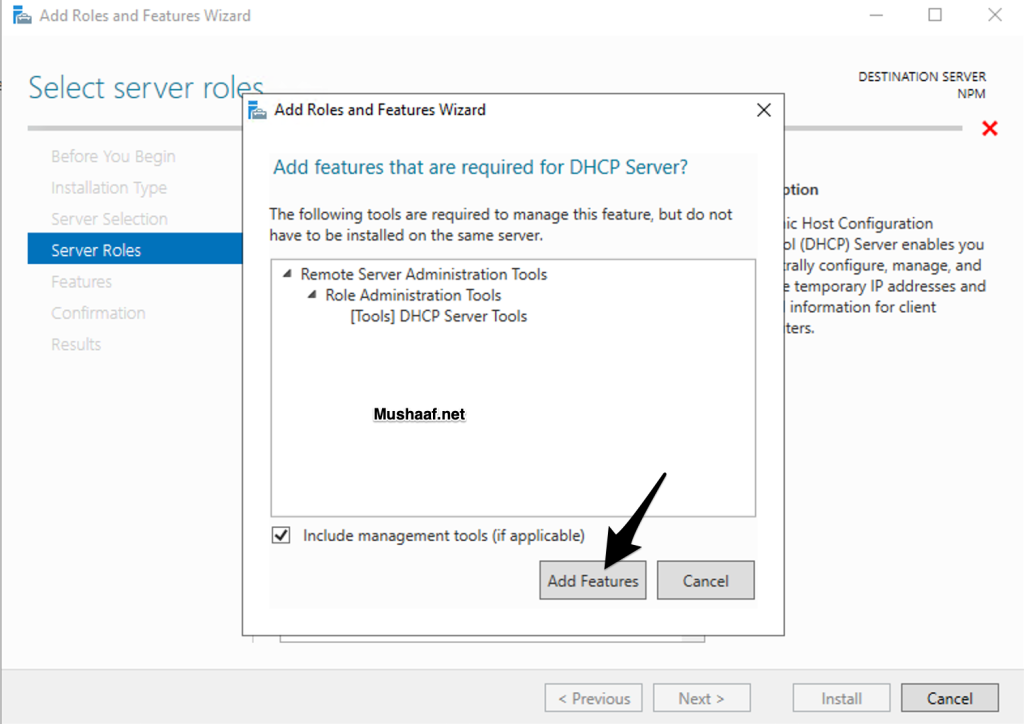
Step 6: Add Features
After you choose “DHCP Server” on the previous step, another pop-up window will come up titled “Add features that are required for DHCP Server?“. Simply click on “Add Features“. Click on “Next” after that.
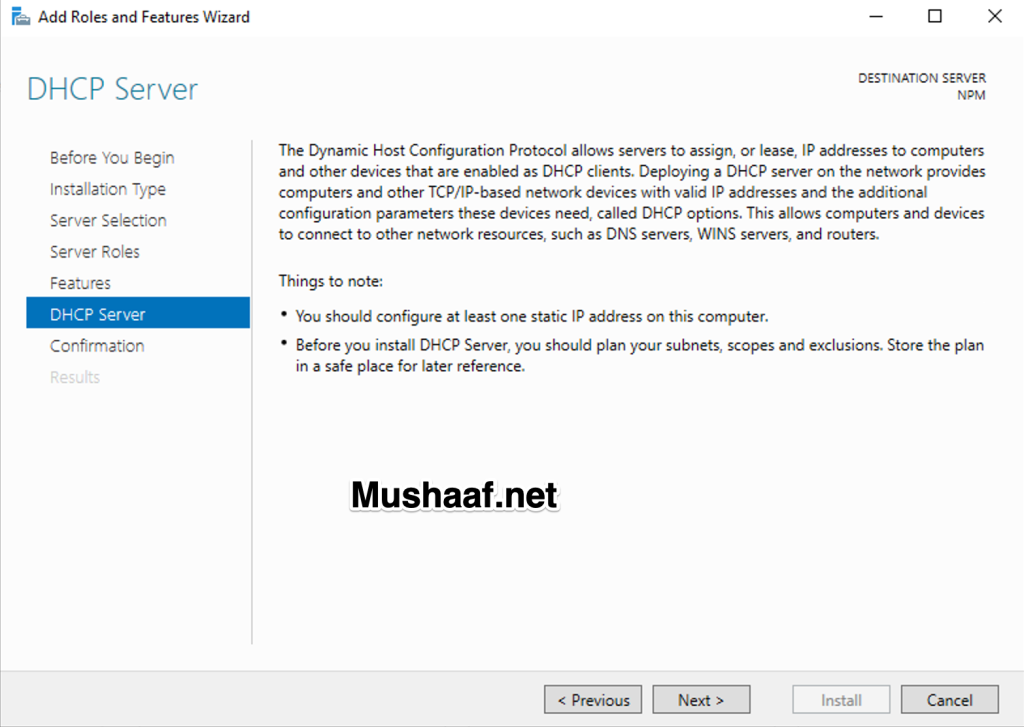
Step 7: DHCP Server
On the next page titled “DHCP Server” simply click on “Next“.
Step 8: Confirm Selections
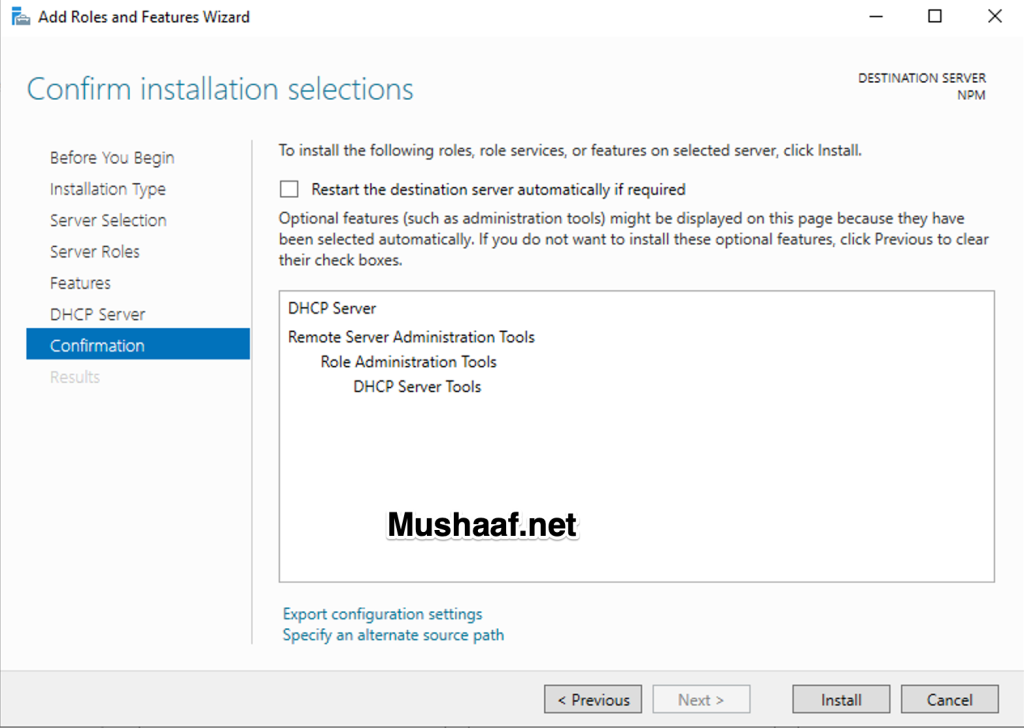
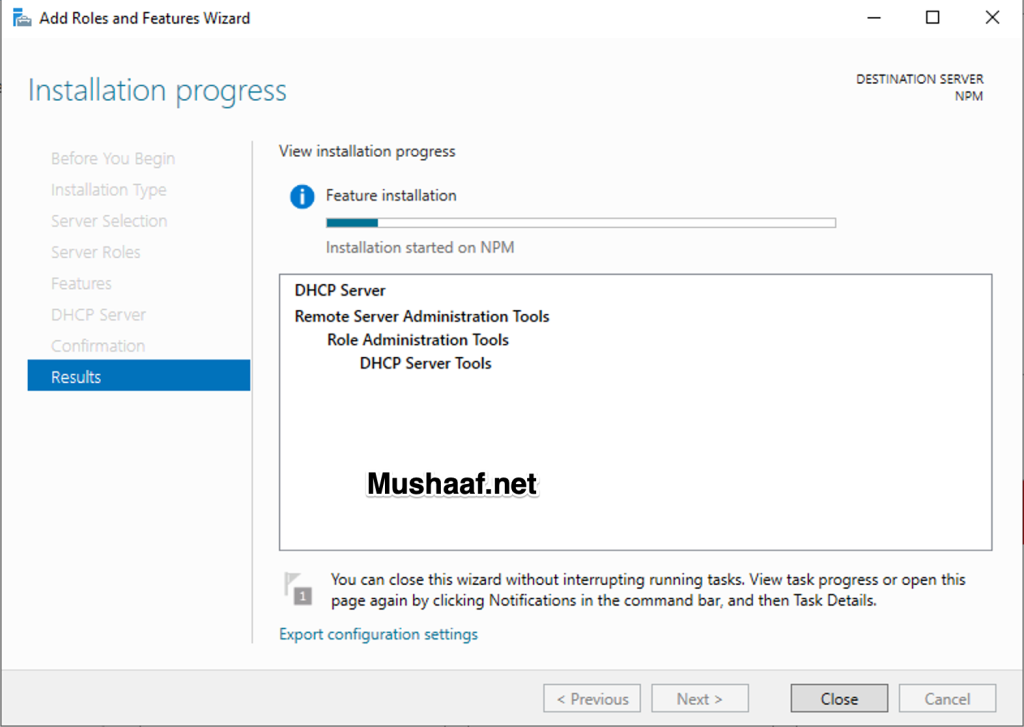
The next page is titled “Confirm installation selections“. Look at the list provided and confirm that DHCP Server and others are listed. After that, click “Install“. After everything is successfully installed, click “Close” and your DHCP Server is installed. Let us proceed to do Post-deployment Configuration on the DHCP.
Step 9: Post-deployment Config
Part 1
Open Server Manager and you should now be able to see “DHCP” as one of the options on the left pane of the window. You should see a yellow-marked warning as shown in the illustration below that says “Configuration required for DHCP Server at …”, Clock on “More” link at the end of the warning sentence.

Part 2
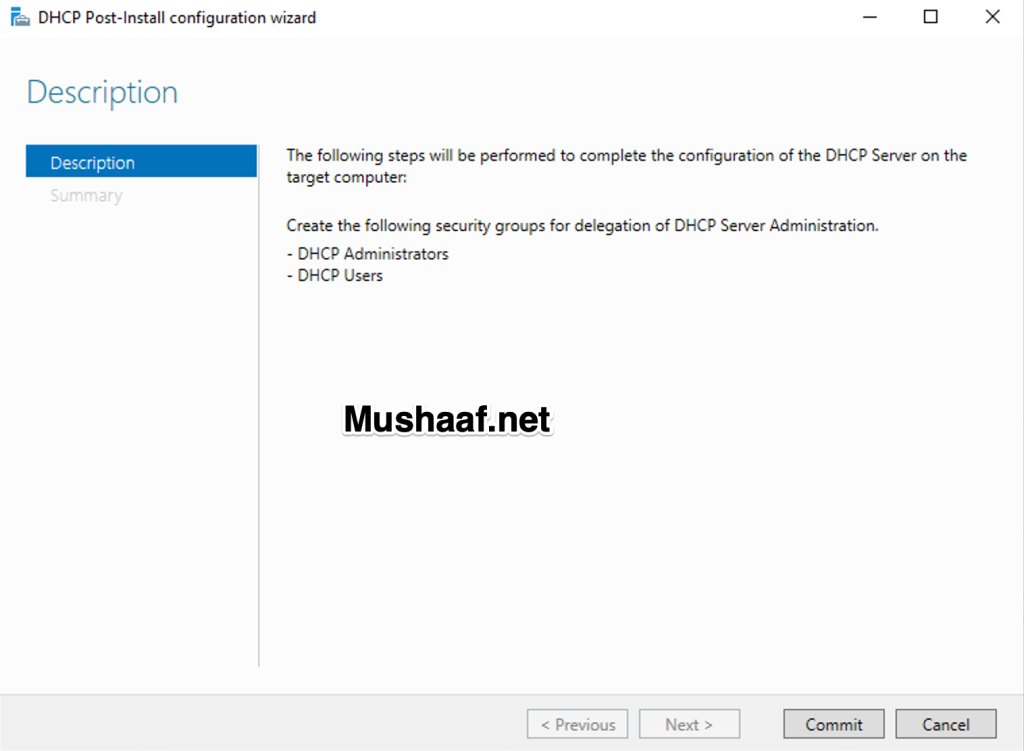
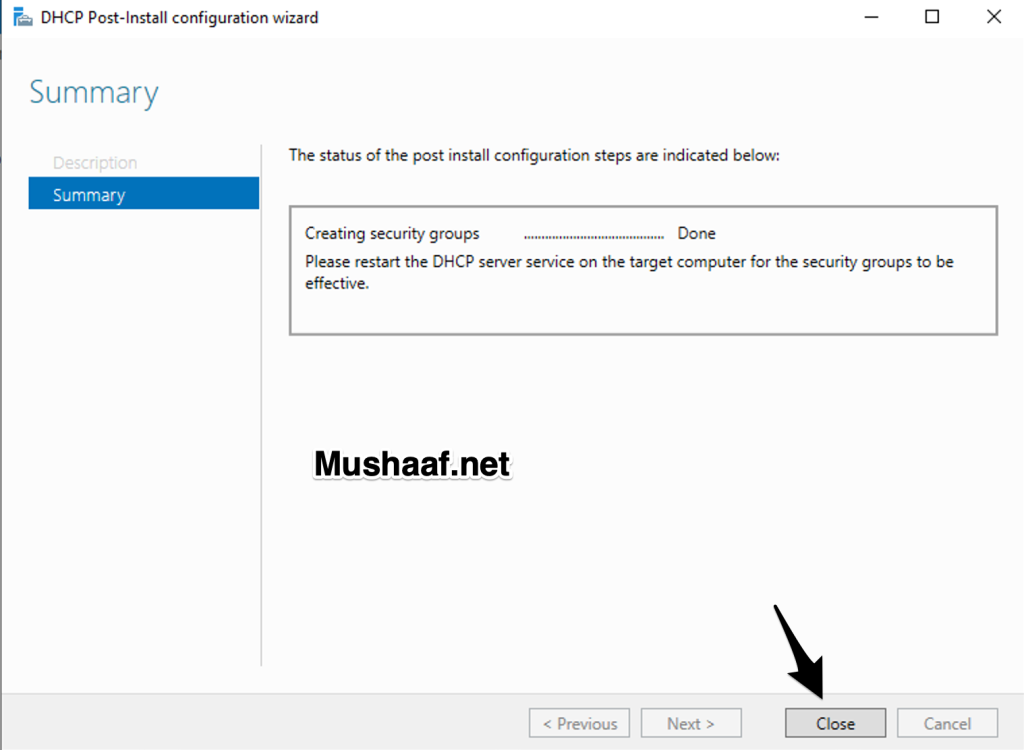
After Part 1, a new window with the title “All Server Task Details and Notifications” will come up. Below it, you will see “Post-deployment Configuration” line. Click on “Complete DHCP Configuration” at the end of that line as shown below. An installation wizard will come up. Click “Next“
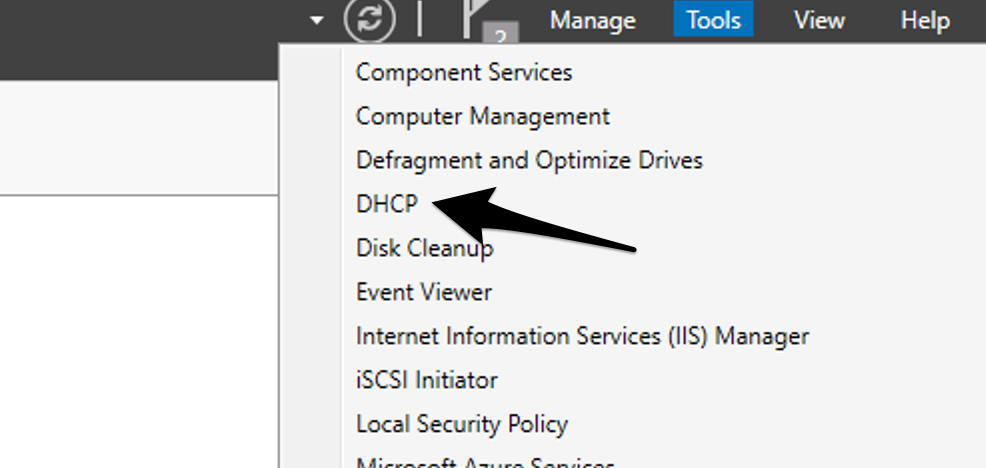
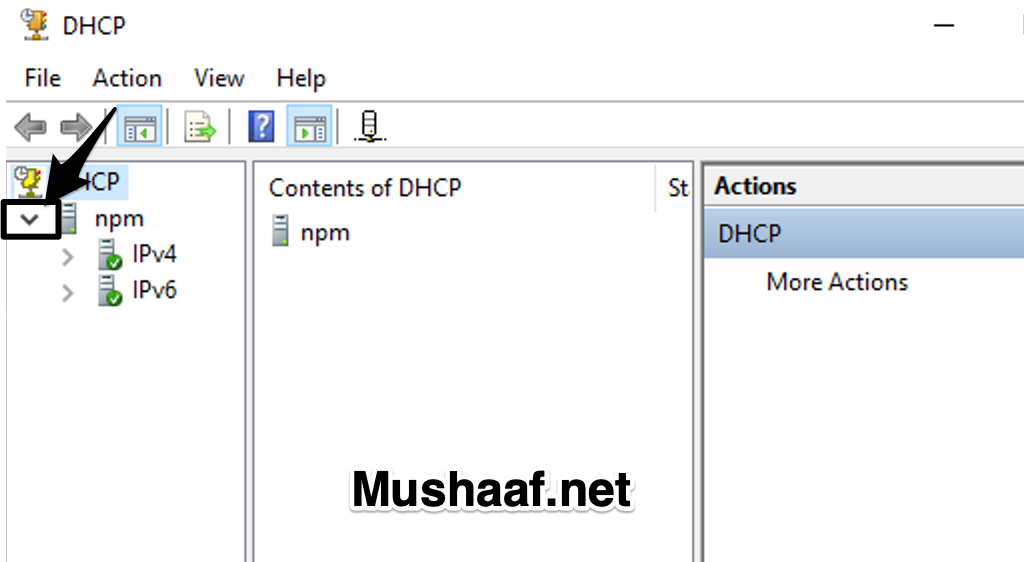
Step 10: Configuring DHCP Server
Go back to Server Manager, click on “Tools” and choose “DHCP“. This will open DHCP Configuration Window as shown below.
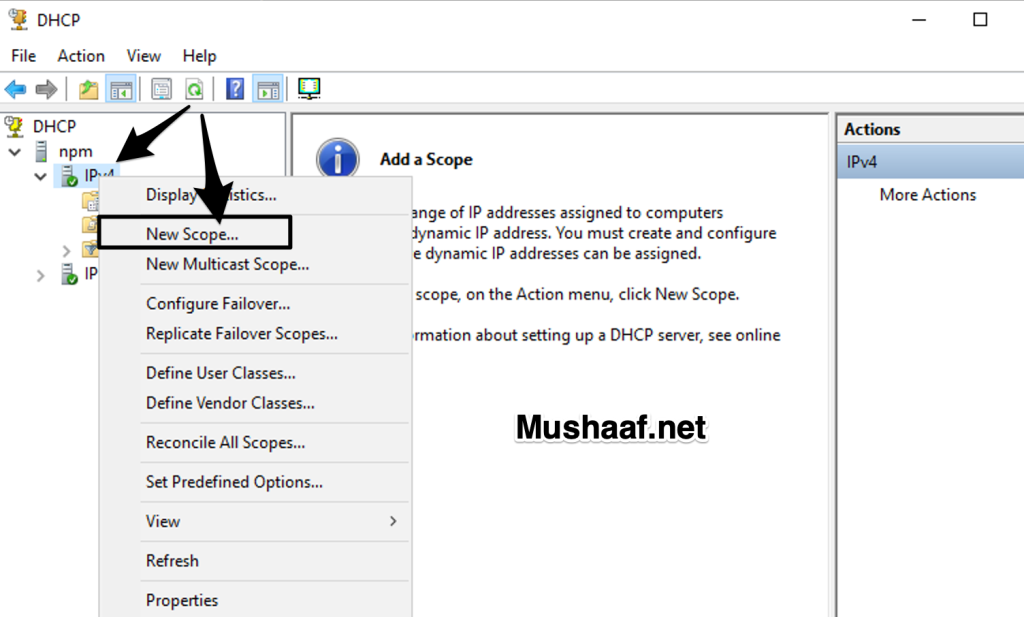
Step 11: New Scope
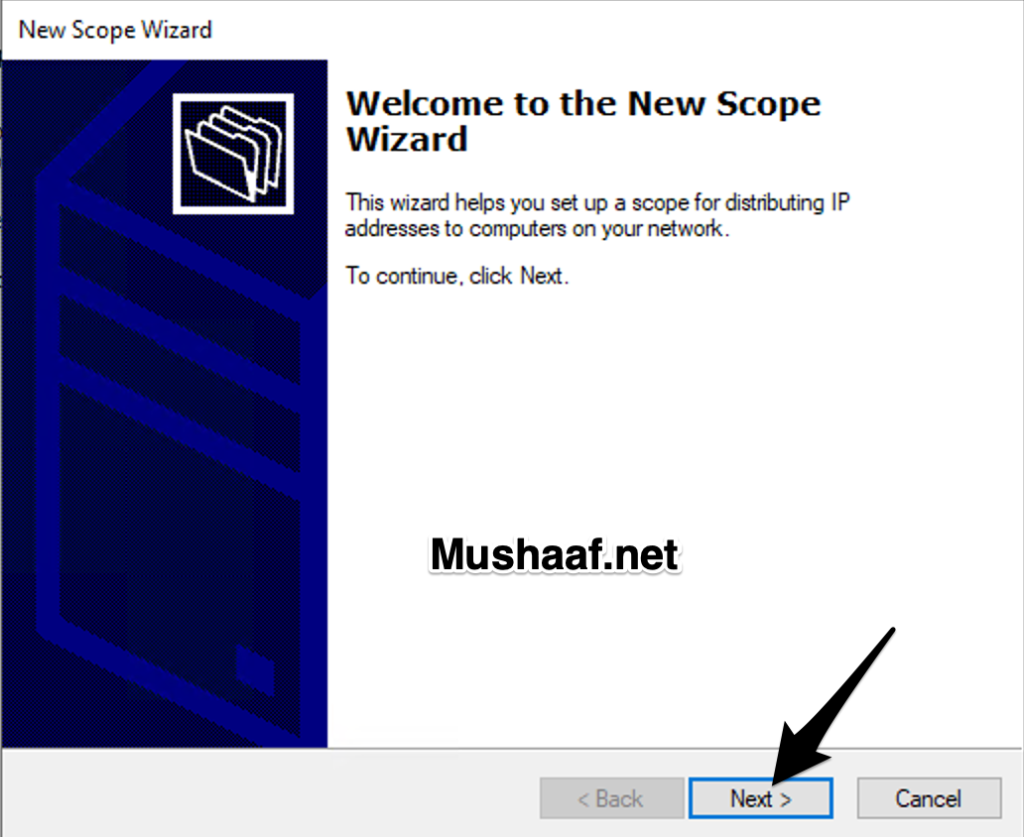
On the left pane of the window, click the drop-down as shown above and right-click “IPv4” then choose “New Scope“. A new scope wizard window will pop-up as shown below. Click “Next“
Step 12: Name your Scope
Put in a name and Description of this new scope and hit “Next“

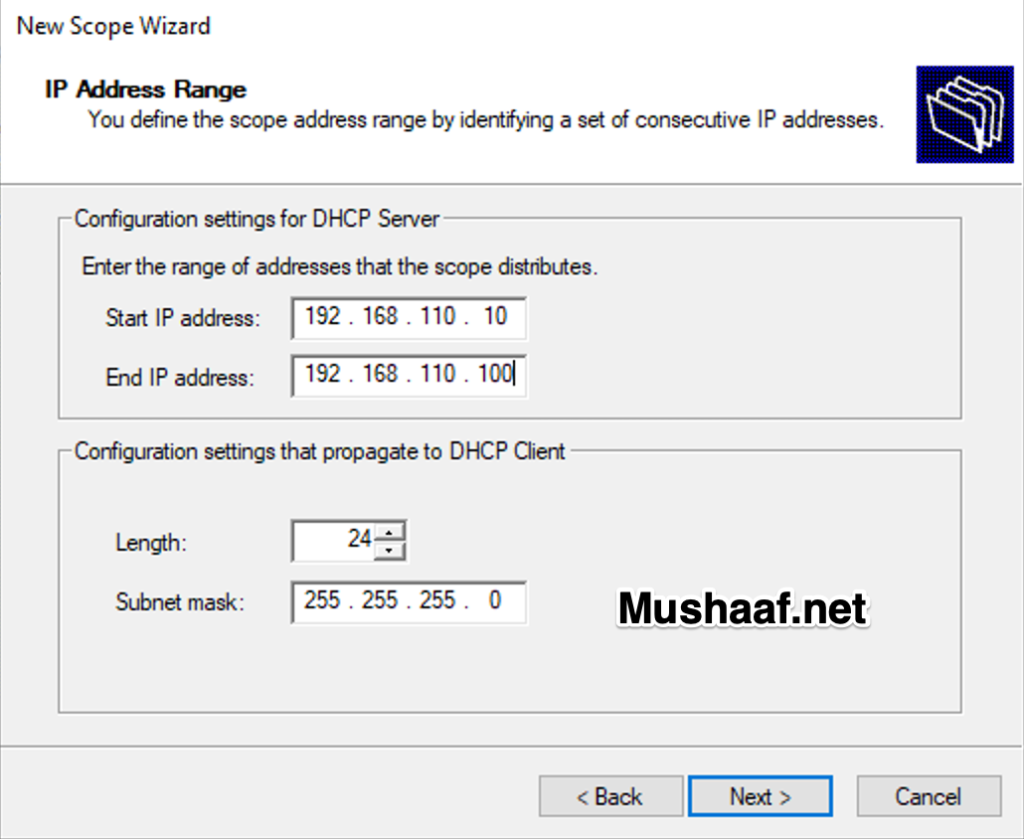
Step 13: Input desired IP Address range
Input your start and And IPs, Length and Subnet Mask than hit “Next“