The DHCP server logging system provides information on successful or failed lease grants, depletion of the server’s IP pool, or requests for messages and their corresponding acknowledgements. Analyzing DHCP server log files is thus an ideal audit mechanism
Common audit codes that might appear in the log include
- 00—The log was started.
- 01—The log was stopped.
- 02—The log was temporarily paused due to low disk space.
- 10—A new IP address was leased to a client.
- 11—A lease was renewed by a client.
- 12—A lease was released by a client.
- 13—An IP address was found to be in use on the network.
- 14—A lease request could not be satisfied because the scope’s address pool was exhausted.
- 15—A lease was denied.
- 16—A lease was deleted.
- 17—A lease was expired.
- 20—A BOOTP address was leased to a client.
- 21—A dynamic BOOTP address was leased to a client.
- 22—A BOOTP request could not be satisfied because the scope’s address pool for BOOTP was exhausted.
- 23—A BOOTP IP address was deleted after verifying that it wasn’t in use.
The DHCP Server uses codes above 50 for Rogue Server Detection information.
Using PowerShell Command
Set-DhcpServerAuditLog -ComputerName “servername.domain.com” -Enable $True -Path “D:\dhcpauditlog\” -MaxMBFileSize 1000
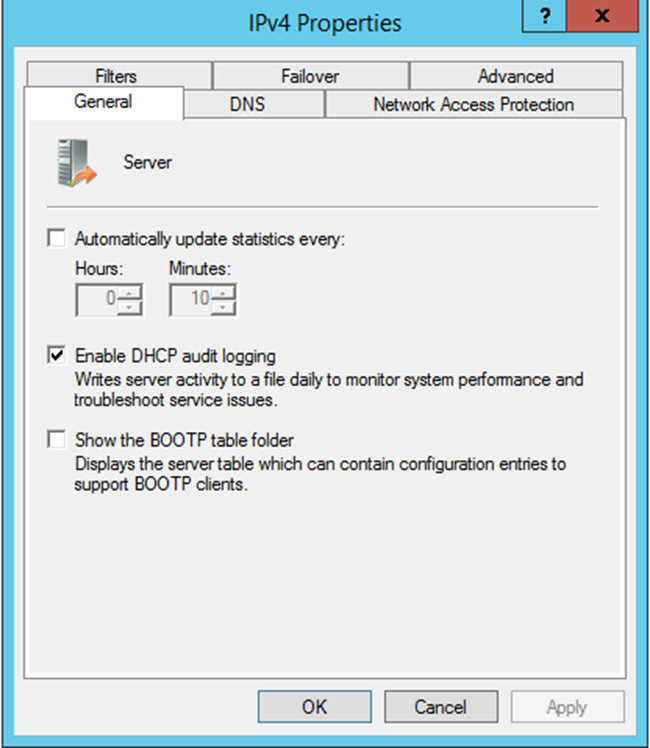
Using a graphical user interface
- Open the DHCP snap-in.
- In the left pane, right-click on DHCP and select Add Server.
- Type in the name of the DHCP Server you want to target and click OK.
- Right-click the server node and select Properties.
- On the General tab, check the box beside Enable DHCP audit logging.
- Click OK