Forward Lookup Zones allow the DNS Server to resolve queries where the client sends a name to the DNS Server to request the IP address of the requested host. This zone should be configured properly as a pre-requisite of installing Active Directory Domain.
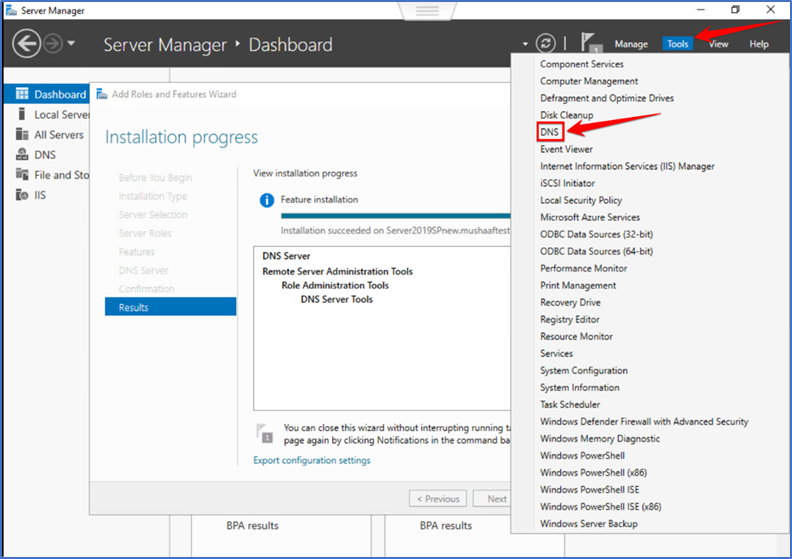
Open “Server Manager Dashboard” Click on tools then select DNS to continue.
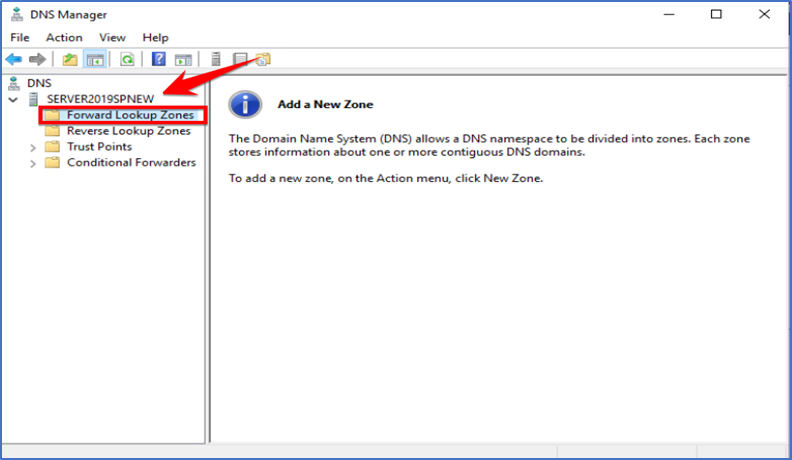
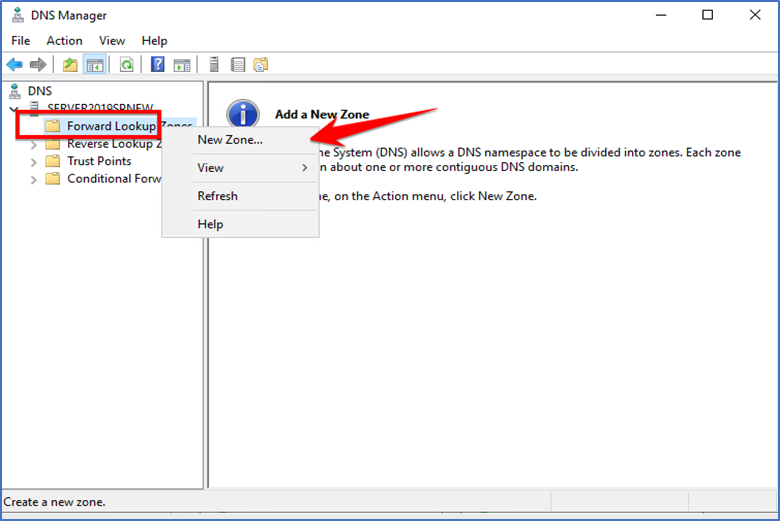
Click on “Server” and expend Click on “forward lookup zones” .
Right-click your server name and choose “New Zone.”. That will open up a New Zone Wizard.
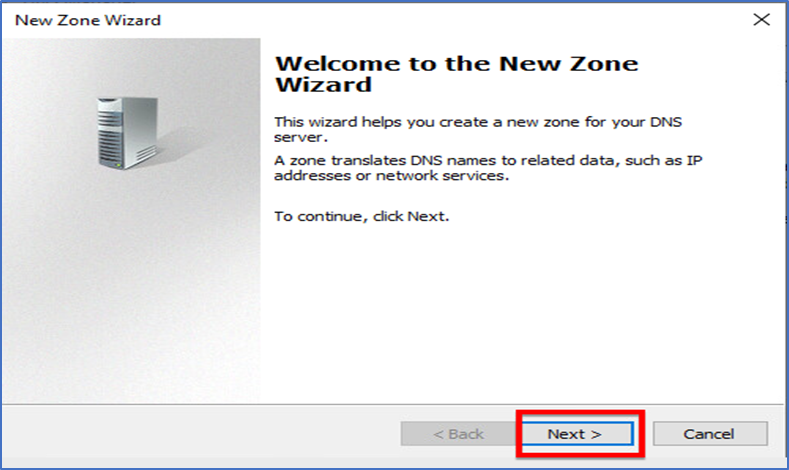
Click “Next” to continue on Wizard screen.
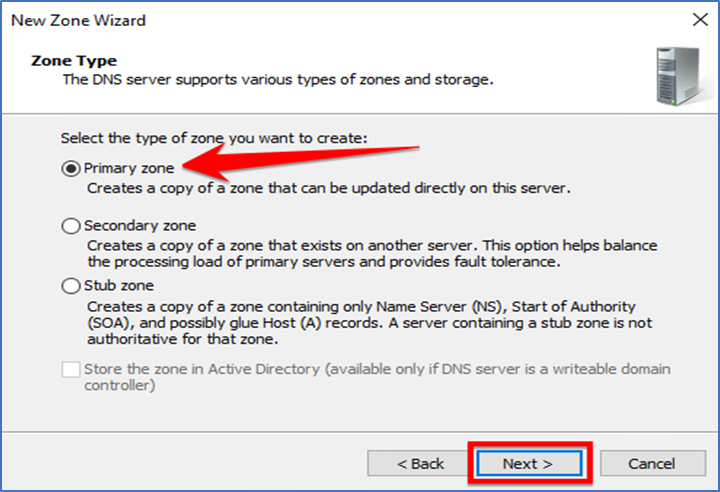
Click on “Primary zone” and select “Next“.
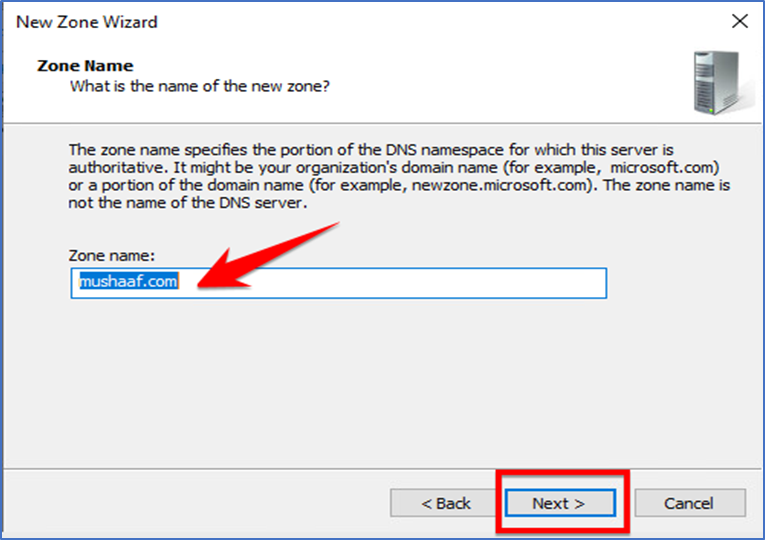
Enter the “Zone Name” for lookup and click “Next“
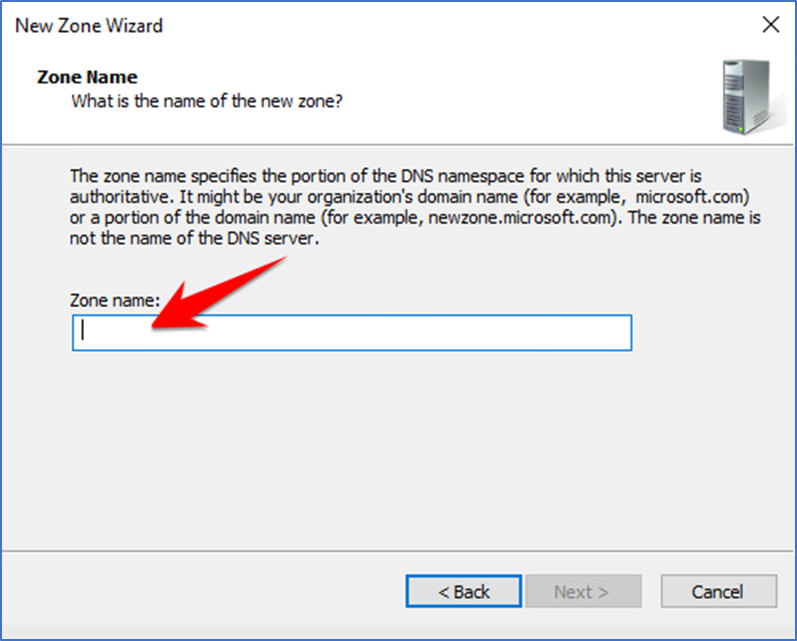
Now “Zone Name” I have entered click next to continue.
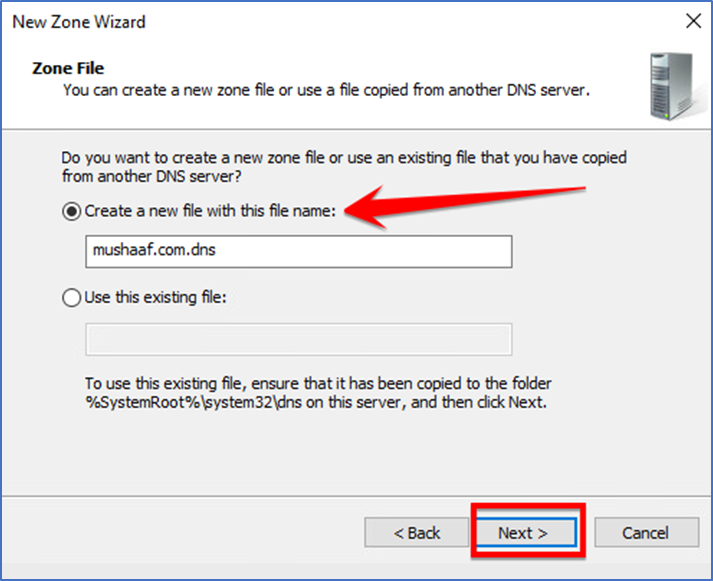
Now select first option “Create a new file with this name:” and select next to continue.
Click “Next” on the “Don’t allow dynamic updates” section.

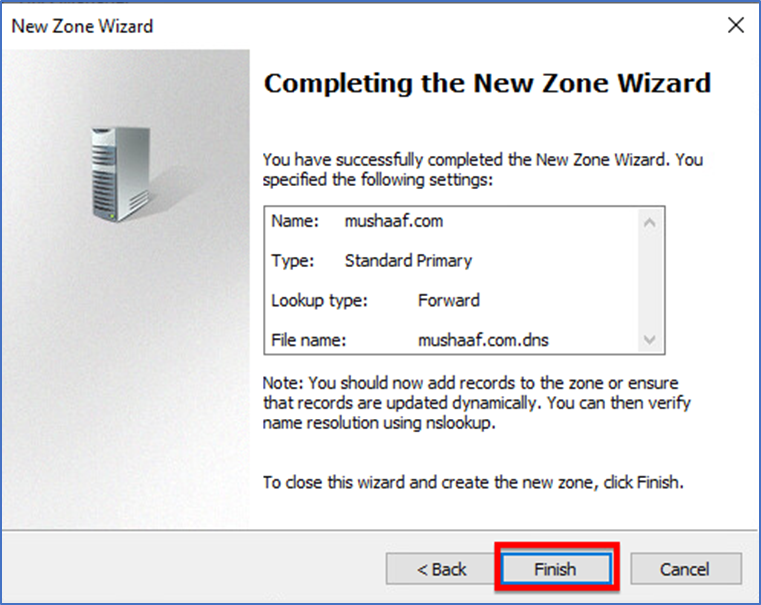
Complete the “New Zone Wizard” click on “Next “to finish.
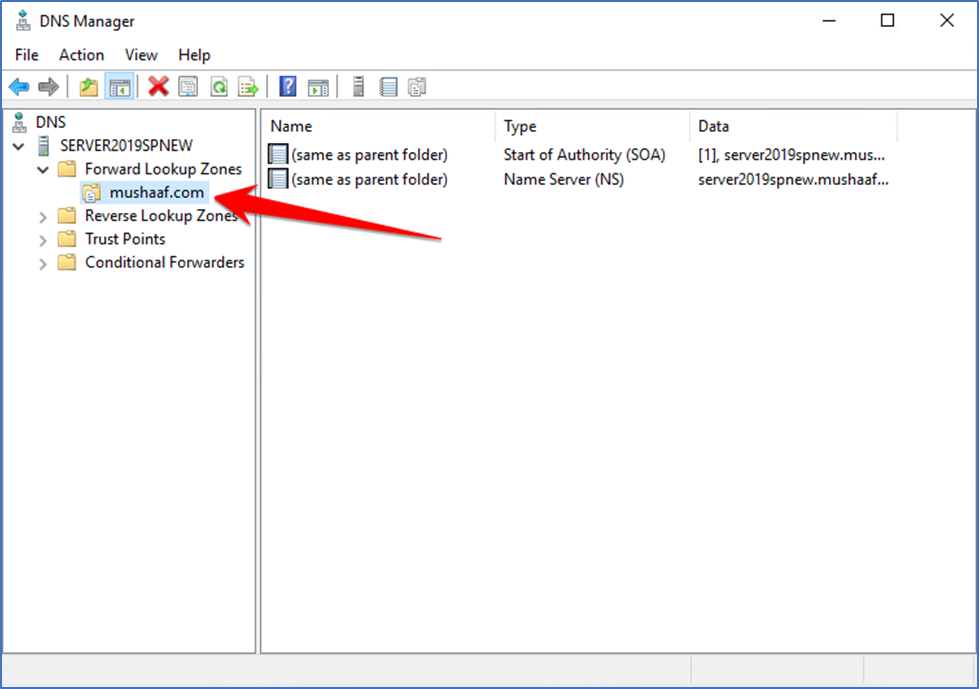
Confirm your “Forward Lookup Zone” by checking your DNS Manager.