


NIC Teaming allows you to combine up to 32 network adapters and then use them as a single network interface. NIC Teaming provides redundancy, allowing network communication to occur over the combined network interface even when one or more of the network adapters fail
Lets get started.
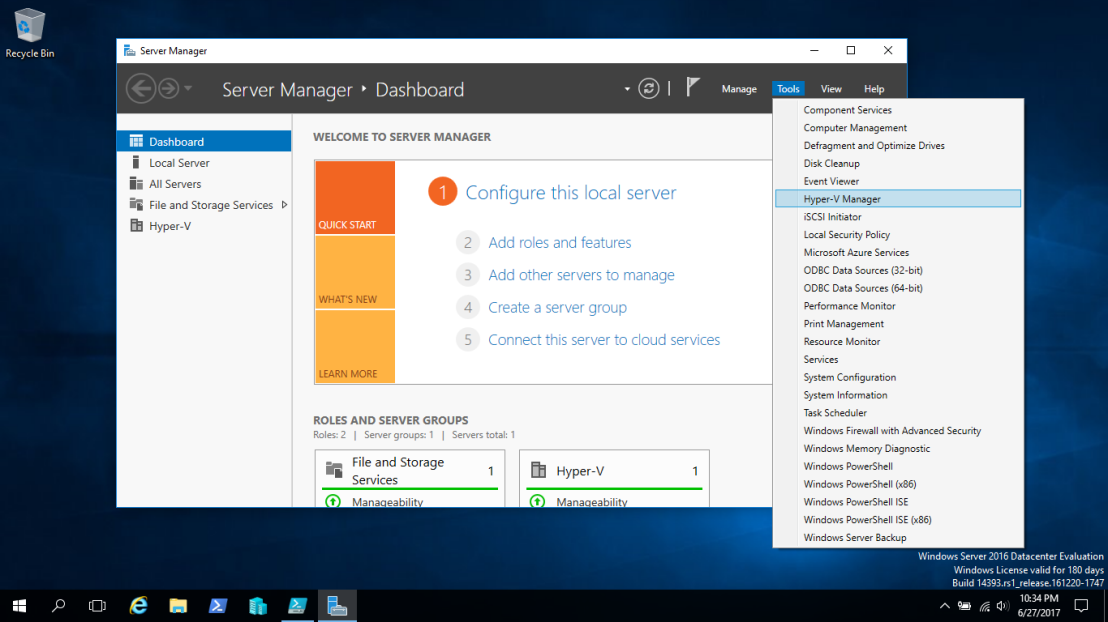
1 – Open Server Manager, and then on the Tools, click Hyper-V Manager.
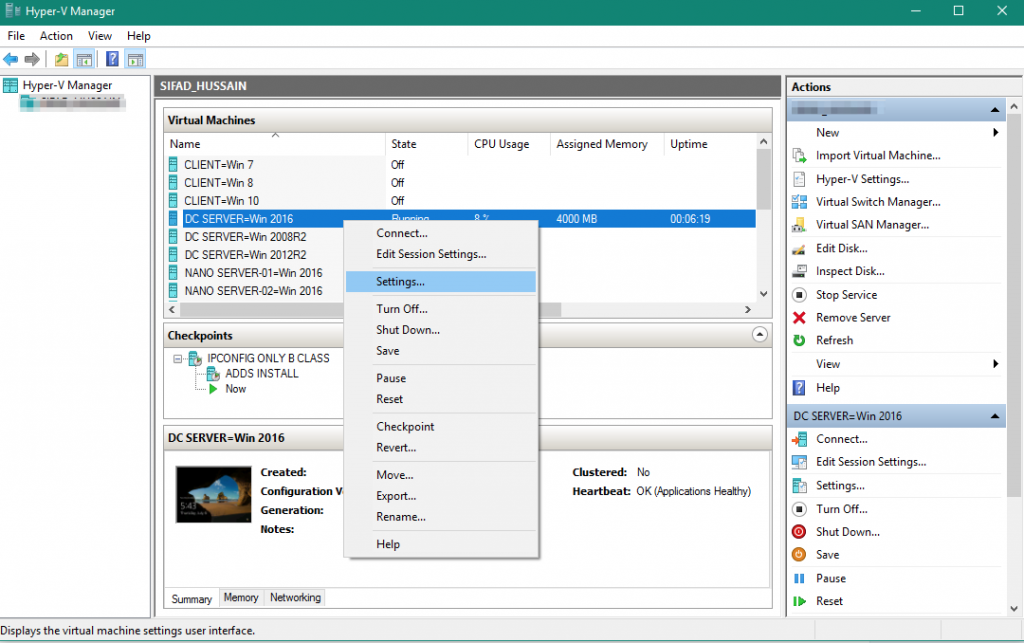
2 – Right-click on VM Settings as shown in image below.
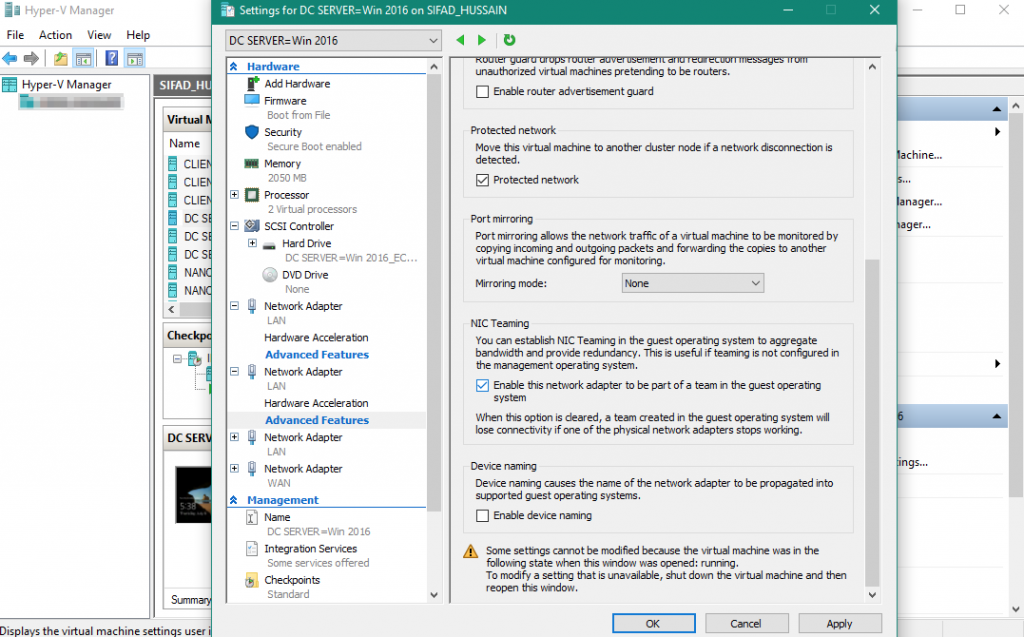
3 – Go to Adapter then Advanced Features, tick Enable this network adapter to be part of a team in the guest operating system.
4 – In the Server Manager console tree, click the Local Server node.
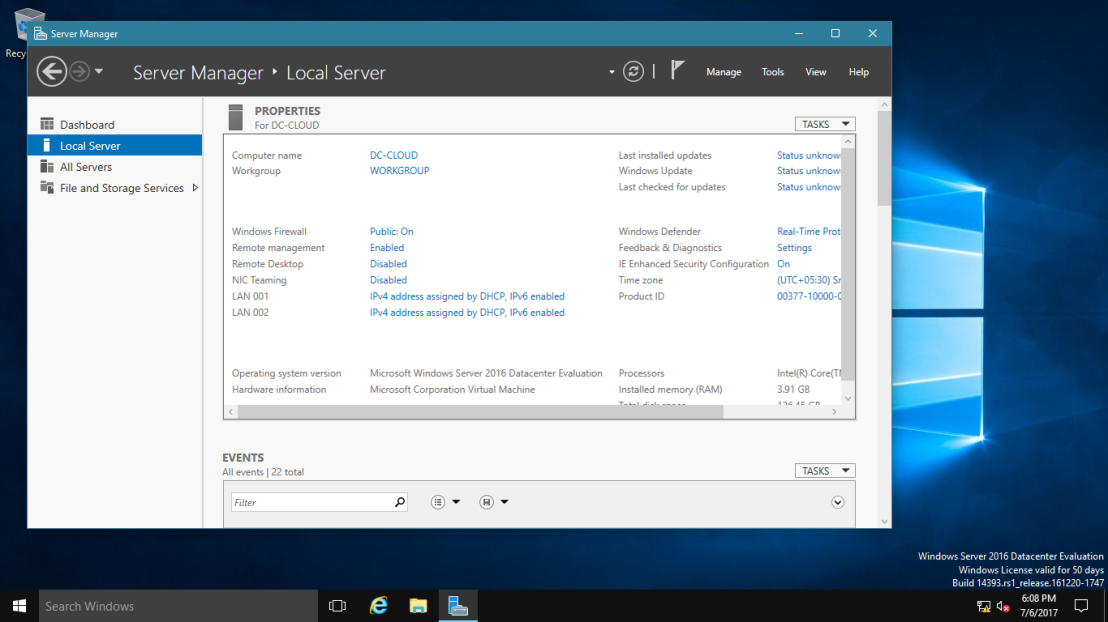
5 – In the Properties details pane, next to the NIC Teaming item, click the Disabled hyperlink.
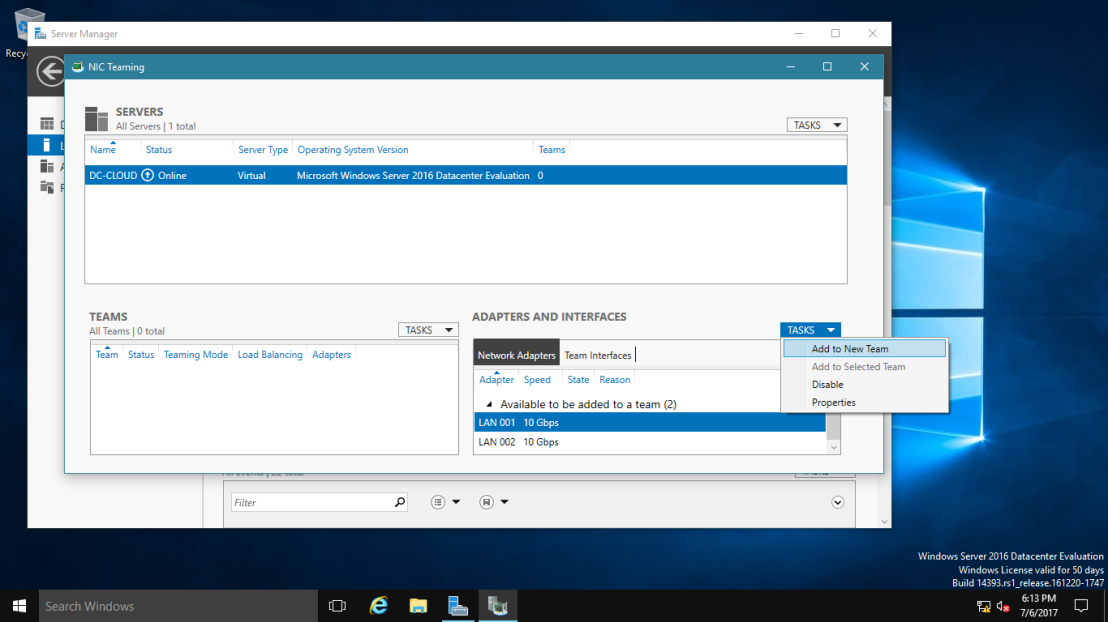
6 – In the NIC Teaming dialog box, in the Adapters and Interfaces pane, click LAN 001, and then in the Tasks list, select Add to new team.
7 – In the Add to new team dialog box, in the Team name box, type Host NIC Team, and Member adapters list Select NIC LAN 002, then click OK.
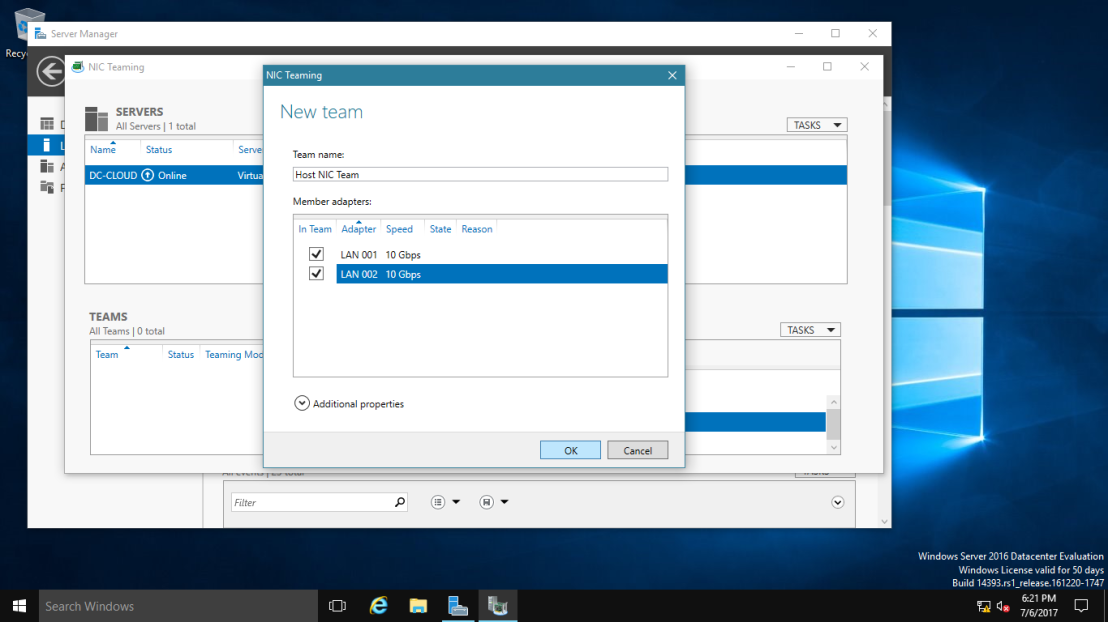
8 – In the NIC Teaming dialog box, in the Teams pane, note the following details:
a. Team: Host NIC Team
b. Status: OK
c. Teaming Mode: Switch Independent
d. Load Balancing: Address Hash
e. Adapters: 2

9 – Verify that Your Server.
That’s all for now!