


With S3 Glacier, customers can store their data cost effectively for months, years, or even decades. S3 Glacier enables customers to offload the administrative burdens of operating and scaling storage to AWS, so they don’t have to worry about capacity planning, hardware provisioning, data replication, hardware failure detection and recovery, or time-consuming hardware migrations.
Steps:
1. Log in https://signin.aws.amazon.com/console
2. Navigate to Services -> S3. Search for the bucket.
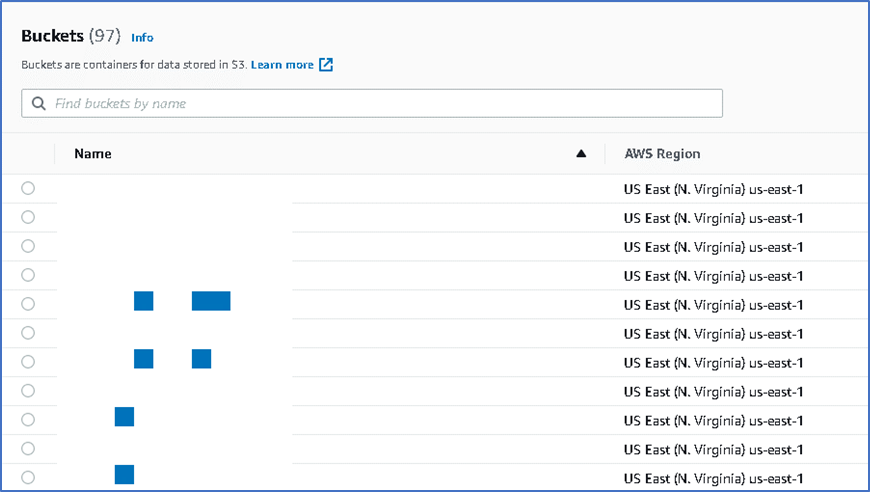
3. Navigate to the location where the file is stored. File prefix in the bucket matches the DFS paths for the related region.

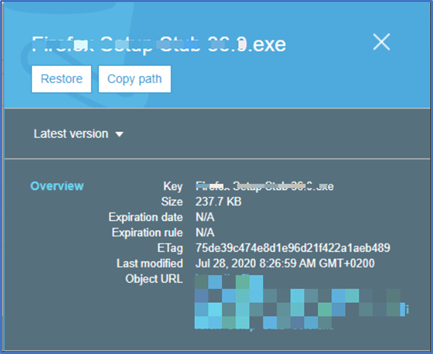
4. Select the file that needs to be restored.
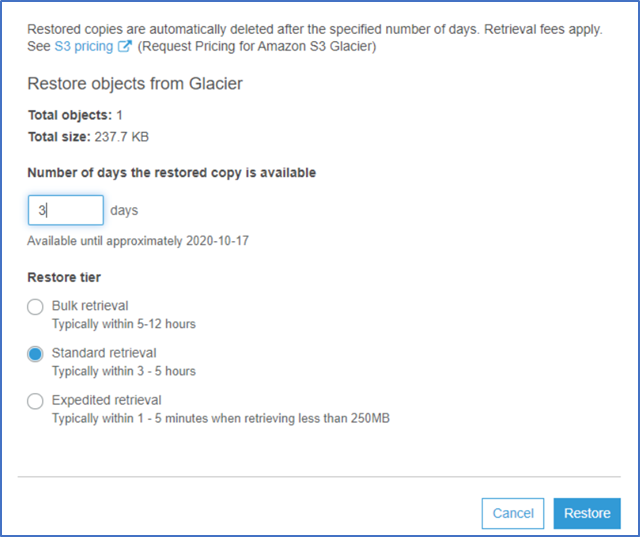
6. In the restore dialog type the number of days the file needs to be available for download (up to 3 days is fine), select STANDARD RETREIVAL and click Restore. NOTE: NEVER SELECT EXPEDITED RETRIEVAL AS THIS WILL INCUR EXTRA COST.
7. After 3-5 hours check if the file is in a restored state. NOTE: Do not download the file from the web console to your computer as it will be considered a potential GDPR issue.
8. If the file is in a restored state and available for download, log in to one of the management hosts and issue a download from S3 in PowerShell:
Get-S3Object -BucketName “my-bucket” -KeyPrefix “path/to/directory” | Read-S3Object -Folder.
Glacier files need to be restored directly to a DFS path and never downloaded from the web console to your computer. S3 Server Access Logging is enabled and all downloads under your name will be logged immutably.