


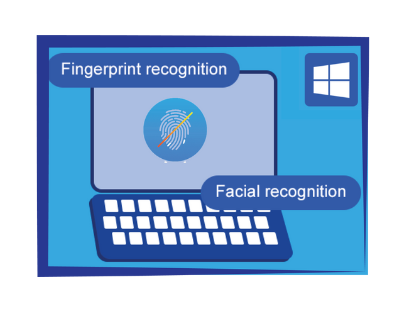
There are several ways of disabling the face recognition and fingerprint login on Windows 10. The most common ones are by configuring it in the Windows Settings or through device manager. However, there are also other methods, like Group Policy Editor and Registry Editor. These methods will completely disable the features from even Windows Settings.
IF you are login with that user on which the Finger print or face lock is set then you can remove it by follow these steps
- Open the Windows Settings. Select the Accounts setting option.

2. In the left pane, click on the Sign-in options. Now click on the Windows Hello Face and Windows Hello Fingerprint, then click on the Remove button to disable it Removing Fingerprint Login.

3. This will disable the biometrics feature in Windows.
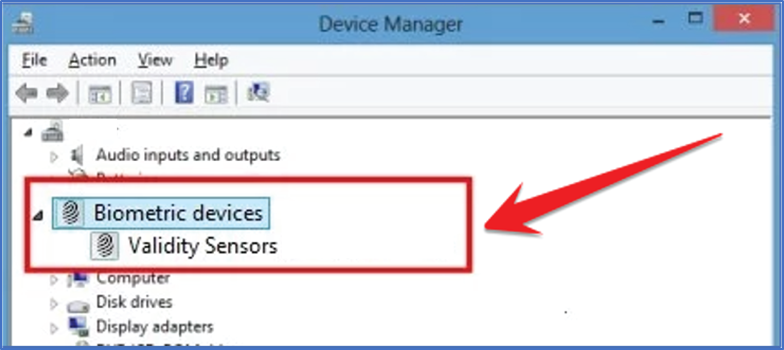
Disabling Biometric Devices through Device Manager
Another way to completely disable the fingerprint login or face recognition is by disabling the devices in the device manager. Users can disable the devices that are additional to the operating system.
- Open run and type “devmgmt.msc” and press Enter to open Device Manager.

2. Opening Device Manager and disabled “Biometric device”
Disabling Biometrics by Using the Local Group Policy Editor
You can also disable the biometrics sign-in options through the local group policy editor.
- Open the Run dialog type “gpedit.msc” in the dialog and press the Enter key to open the Local Group Policy Editor.

2. Navigate to the following location in the left pane of the Local Group Policy Editor:
Computer Configuration\Administrative Templates\Windows Components\Biometrics
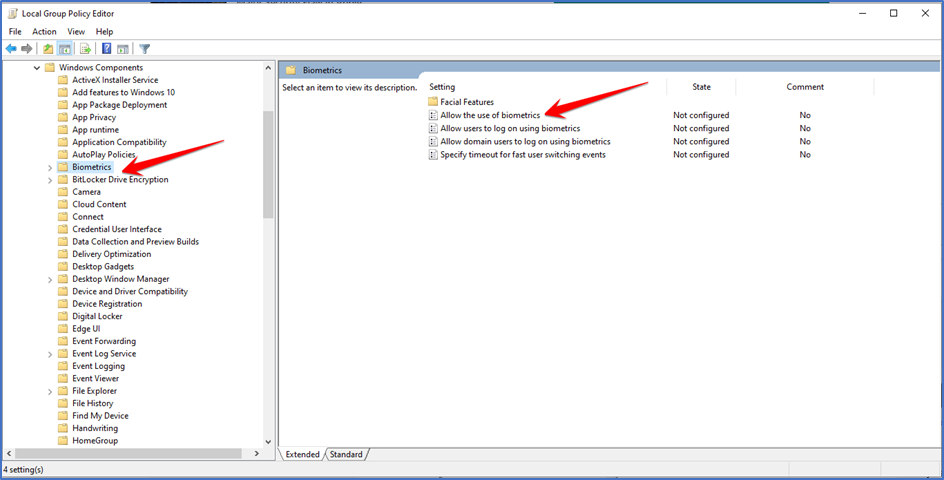
3. Double-click on the setting named “Allow the use of biometrics“. This will open another window, change the toggle from Not Configured to Disabled. Click on the Apply/Ok button to apply the changes.

4. Disabling biometrics
Disabling Biometrics by Using the Registry Editor
Unlike the Local Group Policy Editor, the Registry Editor is available on all versions of the Windows operating system.
- Open the Run dialog Then, type “regedit”

- Navigate to the following key in the left pane of Registry Editor:
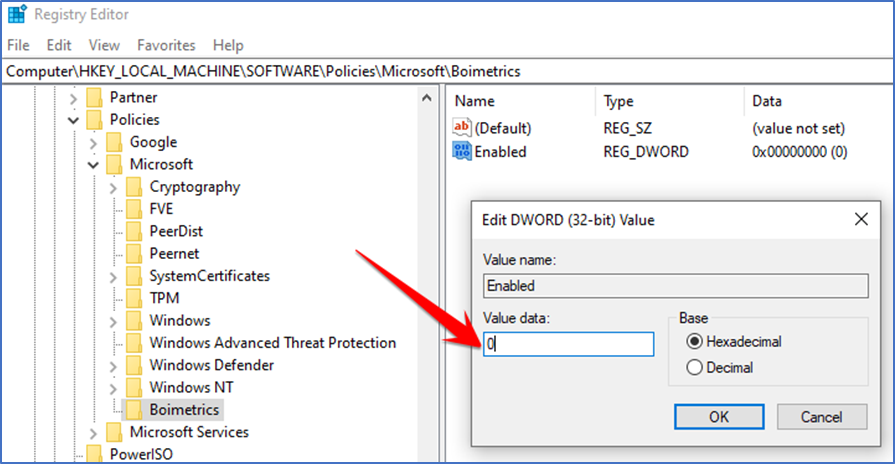
HKEY_LOCAL_MACHINE\SOFTWARE\Policies\Microsoft\Biometrics
2. If the Biometrics key isn’t there already, then create a new key by right-clicking on the left pane and choosing the New > Key option as shown.

3. Now create a value named Enabled by right-clicking on the right side and choosing New > DWORD (32-bit) Value. Double-click on it to open it and make sure the data value is 0 as it should be by default.
Note: Data value 1 is for enabling and data value 0 is for disabling.
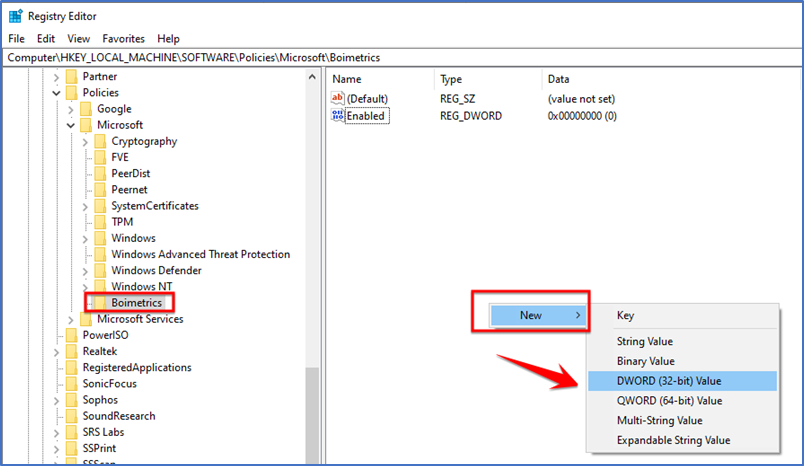
4. Creating the enabled value with data value 0
5. This will disable the biometrics through Registry Editor.