


When migrating to Office 365, Microsoft allows you to upload the content of the user’s Outlook Data Files (* .pst) directly to your Exchange Online/Office 365 mailbox (besides using hybrid scenarios between on-premises and cloud infrastructure). Regardless of which mailbox solution or provider you used before, you can use Outlook to export the contents of the user mailbox to a PST file, and then import it into your Office 365 mailbox.
To export the contents of a mailbox to a PST file in Outlook 2016:
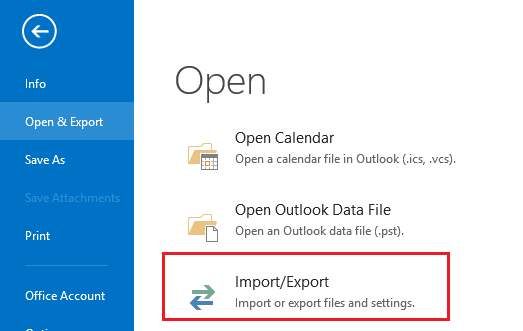
1- Select File > Open & Export > Import/Export
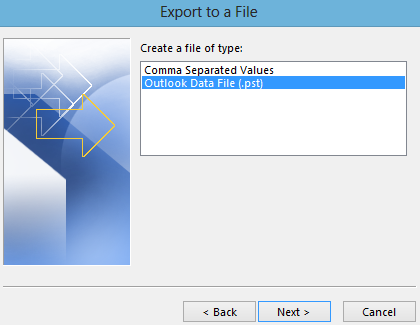
2- In Import and Export Wizard window, select Export to a file > Next > Outlook Data File (.pst) > Next
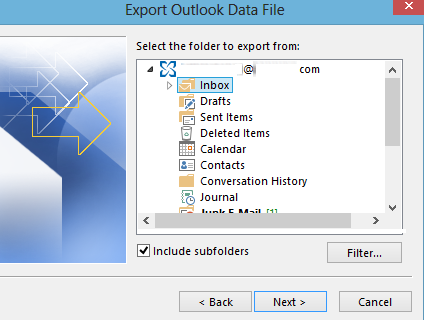
3- Select Outlook folders you want to export to PST
4- Then click the Browse button and specify the directory where you want to save the PST file
5- Click Finish to start exporting.
Now you have a PST file and you can import it to your connected mailbox in Office365 using the Outlook Import Wizard. This import method is done by the user and is suitable for small PST files.
If you need to import large PST files into Office365 or need to import multiple PST files to different users, you can use Import jobs in Office365 Admin Center.
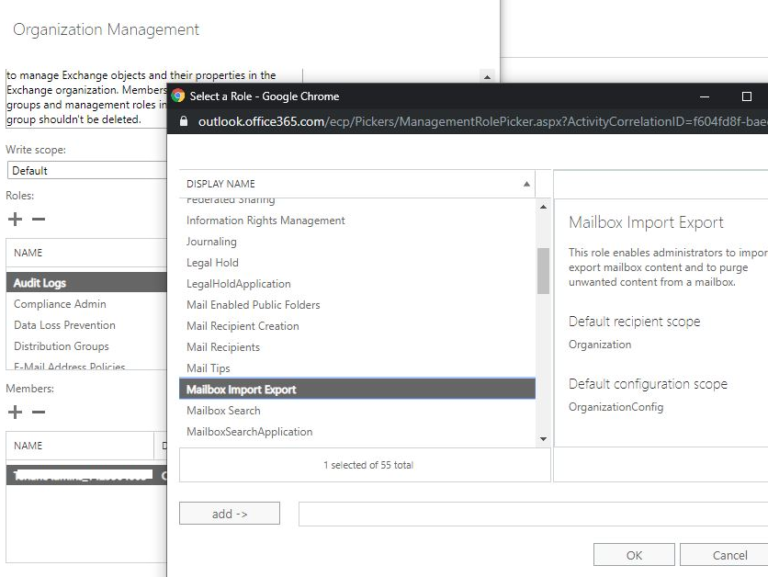
First, assign the Mailbox Import Export role to your Exchange Online account. This role allows you to import PST files to Microsoft 365 user mailboxes (by default, this role is not assigned to any role group or user). You can assign Mailbox Import Export role to the Global Admins:
- Open the Exchange Admin Center;
- Go to Permissions and select Organization Management;
- Click + and select the Mailbox Import Export role
- Save the changes;
- Re-login.
Now you can create a new import job:
- Go to https://protection.office.com;
- Select Information governance > Import > Import PST Files > New import job
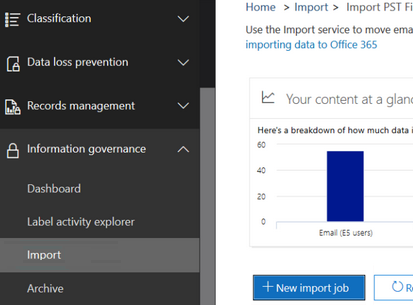
- Specify the name for a new job;
- Select Upload your data and click Next;
Hint. Microsoft offers 2 ways to import PST files to Office 365:
- Network upload — PST file is uploaded over the Internet to temporary Azure storage in Microsoft cloud;
- Drive shipping — you need to copy the PST files to a BitLocker-protected removable drive and physically deliver the drive to the Microsoft location.
- On the Import page, click the Show network upload SAS URL link. A SAS URL for the Azure storage location will be generated for you, where you can temporarily upload your PST files
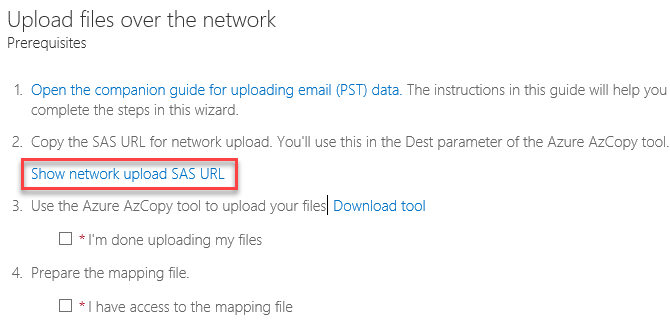
- Now download and install the Azure AzCopy tool on your computer;
- With the following command, you can download all PST files from the specified directory to Azure storage (provide your SAS URL):
AzCopy.exe /Source:"D:\PST" /Dest:"https://xxxxxx.blob.core.windows.net/xxxxIngestionSasForAzCopyxxx" /V:"D:\temp\log" /Y
4. Create a csv file of the following format. It should contain the mapping between PST files and Office 365 mailboxes:
Workload,FilePath,Name,Mailbox,IsArchive,TargetRootFolder,ContentCodePage,SPFileContainer,SPManifestContainer,SPSiteUrl

Exchange,,SWarner.pst,s.warner@theitbros.com,FALSE,/,,,,

Exchange,,JMuller.pst,j.muller@theitbros.com,FALSE,/,,,,
Mark the checkboxes I’m done uploading my files and I have access to the mapping file. Click Next and select your mapping csv file;
5. Click Validate > Save
6. Click the Import to Office 365 in the details of the import job
7. Wait until the end of importing PST files to user mailboxes.
Hint. You can monitor the progress of import processes on the Office 365 side using the following PowerShell command (your PowerShell session must be connected to Exchange Online):
Get-MailboxImportRequest | ForEach-Object -Process { Get-MailboxImportRequestStatistics -Identity $_.RequestGuid } | Select-Object -Property BatchName, TargetAlias, StatusDetail, StartTimestamp, OverallDuration,TotalInProgressDuration,EstimatedTransferSize,PercentComplete,@{Label='File';Expression={$_.AzureBlobStorageAccountUri}}