


In a traditional on-premises infrastructure, the system administrator has complete control over user access to corporate resources. When using cloud solutions, access to resources can be carried out both from the corporate network and outside. Condition Access (CA) is an Azure Active Directory feature that can be used to allow or deny access to company resources based on user, device, location, 2FA, and a number of other factors. Condition Access allows you to dramatically increase the security of your resources without complicating user access.
The Conditional Access mechanism is to validate each process of connecting to the resource based on a customized scenario and a decision that determines what to do with that connection. In a Condition Access policy, you can deny access, allow without conditions, or allow with conditions.
Conditional Access allows you to use different conditions when granting a user access to a resource:
- Is the user a member of a specific Azure AD group?
- What cloud application is the user trying to connect?
- Whether it is connected from a controlled device or not (Intune/Hybrid Azure AD joined)?
- From which IP address / subnet the user is trying to connect?
- What type of client the user is using (an app on a computer, phone or browser)?
- etc.
You can combine these conditions to provide the highest level of protection when accessing your corporate resources.
Note. Be careful when creating Conditional Access policies. It is advisable to exclude the Global Admin group from your Conditional Access policies to save yourself from losing access to Azure.
Azure Active Directory (AD) Conditional Access policies are available with Microsoft 365 Business subscriptions (previously only available for Azure AD premium subscribers).
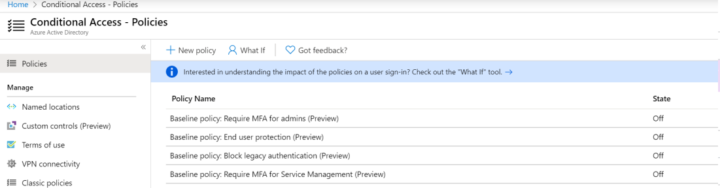
Log into your tenant as an administrator and go to the Security > Conditional Access Policies section.
Even with a regular Azure subscription, four Conditional Access preview policies are available
- Block legacy authentication — the policy blocks access via legacy authentication protocols that do not support multi-factor authentication (MFA). For example, IMAP, POP, SMTP (the policy does not block Exchange ActiveSync);
- Require MFA for admins — the policy requires the mandatory use of MFA for some administrative roles;
- End user protection — the policy enables the use of MFA for users (the user must complete the MFA registration via the Microsoft Authenticator app within 14 days after the first login);
- Require MFA for Service Management — MFA requirement for users to sign in to services based on the Azure Resource Manager API (Azure Portal, Azure CLI, PowerShell).
With a qualifying Azure subscription, you can create your own Conditional Access Policies.

In the Assignments section, you need to specify the conditions for applying the policy.
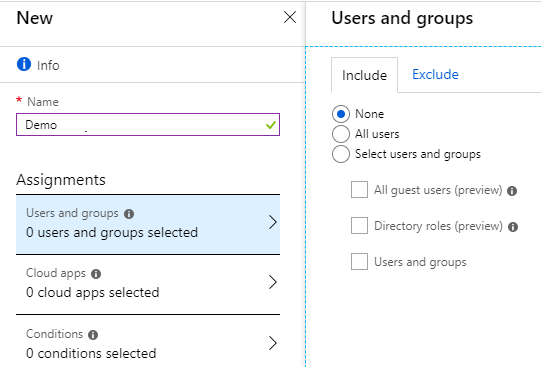
Users and groups — which users are covered by the policy. These can be all users in Azure AD or specific groups/users. Exceptions can be specified separately.
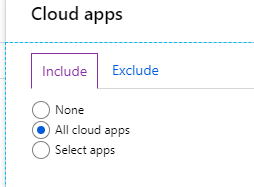
Cloud apps — select apps registered with Azure AD (you can select more than Office 365 apps)
Additional conditions are specified in the Conditions section.
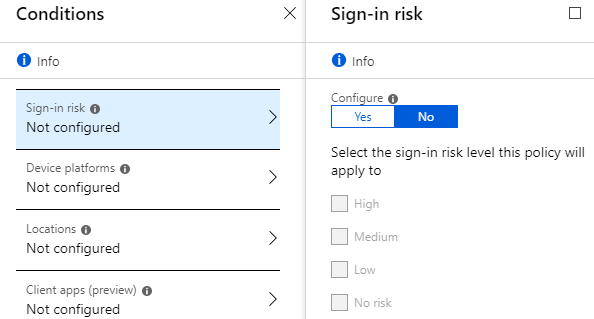
Sign-in risk — a mechanism for assessing the authorization risk (from where, at what time, using which client, how common is this behavior, etc). An Azure AD Premium 2 license is required.
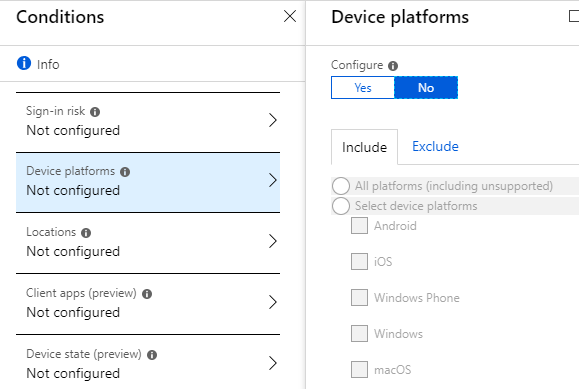
Device platforms — it is possible to specify which platform the policy will apply to (for example, only mobile clients, or only Windows computers
Locations — allows you to use lists of trusted IP addresses.
Next, you need to configure what exactly the policy will do or require.
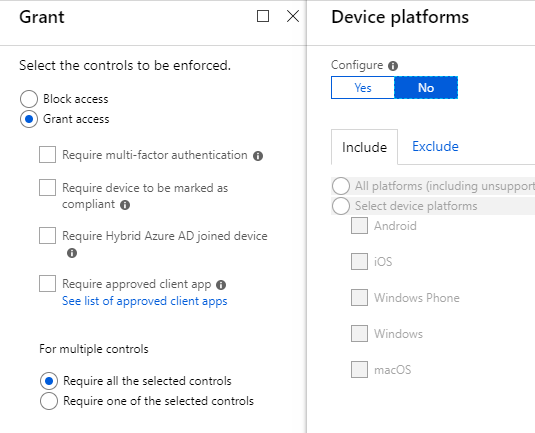
Grant — you can block access or allow and request additional security measures.
Setting up Conditional Access policies in the Azure Portal is quick and easy. PowerShell can be used with Microsoft Graph to configure complex CA policies or in automation deployment scripts.