


The modern security perimeter now extends beyond an organization’s network to include user and device identity.
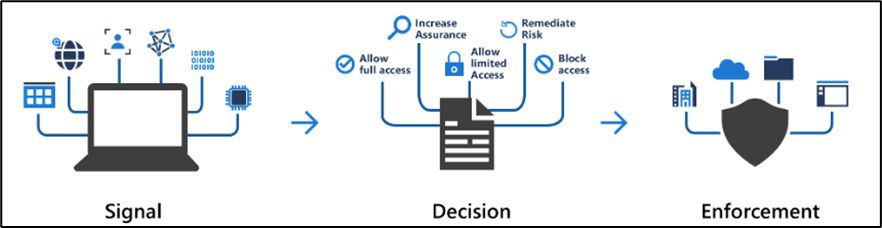
Conditional Access brings signals together, to make decisions, and enforce organizational policies. Azure AD Conditional Access is at the heart of the new identity-driven control plane.
Conditional Access policies at their simplest are if-then statements, if a user wants to access a resource, then they must complete an action. Example: A payroll manager wants to access the payroll application and is required to do multi-factor authentication to access it.
Administrators are faced with two primary goals:
- Empower users to be productive wherever and whenever
- Protect the organization’s assets
Use Conditional Access policies to apply the right access controls when needed to keep your organization secure.
In this article we will show you to create conditional access policy for location or IP specific. Open your Azure AD and on the left side click on Security > Conditional Access > Named Locations

- Then select Country location or IP ranges location. If you select Country Location you will have all the countries available in that list to choose the required one. For IP you can use both protocol IPv4 or IPv6.
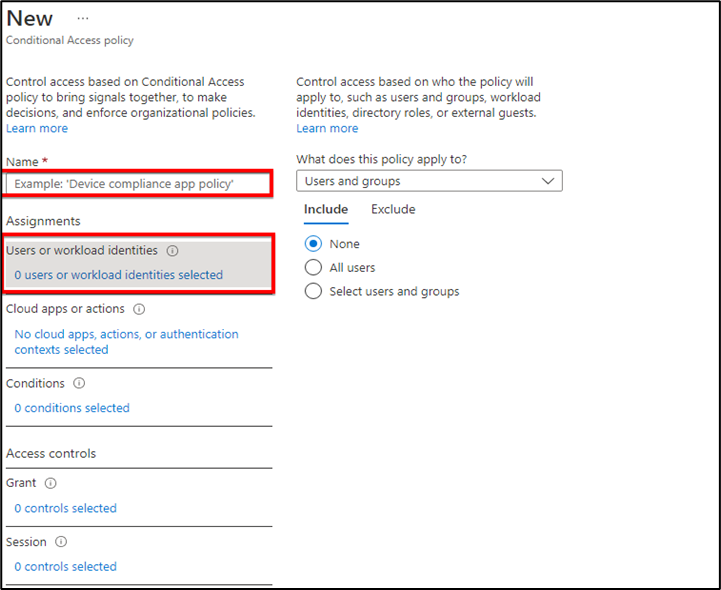
- Then after creating the location we have to create the conditional access policy. Above “Named Location” section we can find “Policies” click on that and then click on “New Policy”.

3. Give that policy a name and then select “Users or workload identities”, who the policy will apply to. We have two options here Include and Exclude we can use according to our requirement.
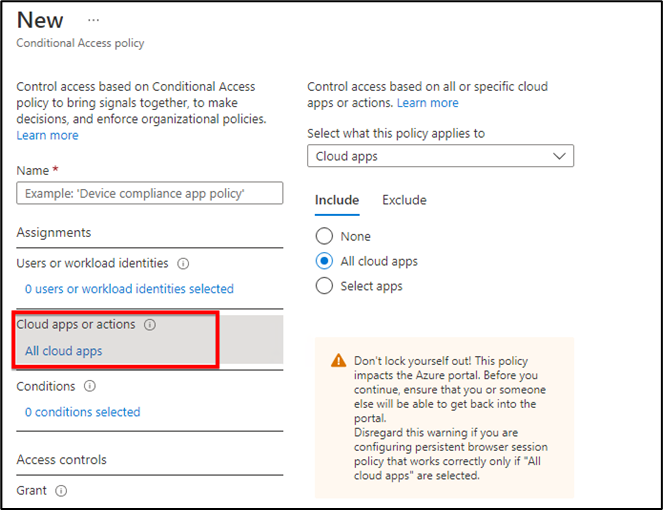
4. “Cloud apps or actions” based on all or specific cloud apps. If you select all cloud apps then it will also show you warning that it impacts on Azure portal and you can lock yourself. If you pick Select apps option then it will gives you options for many cloud apps on which you want to apply this policy.
For example we would like to pick Microsoft Teams or Azure Virtual Desktop to be used from specific IP or location then we can pick that app here.
5. Next option is “Condition” in which we will pick our location which we created earlier. Our Location is geographical or IP based as per our requirement. When we click on selected location it will show us the locations which we have created and we just need to select that.

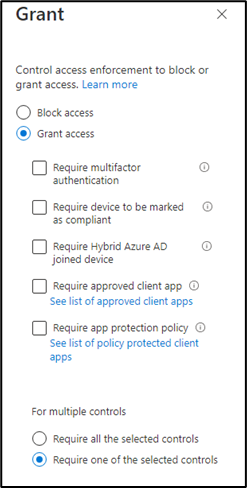
6. Next option is “Grant” in which we have two type of access, Grant access and Block access.
Block access: If on the previous option “Condition” we have selected that all locations are blocked except our location then on the “Block access” we can just pick this option
Grant access: In this option we have further options that grant access if following criteria meets. We can choose one control or all the controls.
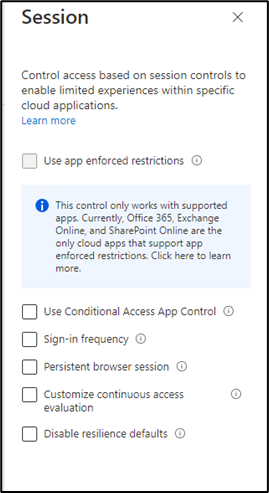
7. Last option is “Session” this control based on limited experiences with specific apps. It has 6 controls and each one can be applied on their selected apps so at this stage we can leave this option.
8. After creating the policy, we have the option to enable it. If we want to apply this policy later on then we can set as off at this stage.

That’s all. If you found this article helpful then let us know in the comment section.