The following are the steps to enable SFTP on a Windows server 2019:
- Go to Windows Settings–>Apps.
- Click on “Manage optional features” Under apps and features menu.
- Look for OpenSSH Server, check if it’s already installed, if not click on “Add a feature” to install
How to set up an SFTP server in Windows using OpenSSH
Installing OpenSSH
- Download OpenSSH from GitHub.
- Extract the archive to the Program Files folder.
- Open PowerShell as an administrator, and paste the following command in the window, to navigate to the folder: cd “C:\Program Files\OpenSSH-Win64”.
- SSH requires two services to run, sshd and ssh-agent. To install these, paste the following command in the PowerShell window: exe -Execution Policy Bypass -File install-sshd.ps1. You should see a message which says “sshd and ssh-agent services successfully installed”.
- Close the PowerShell window.
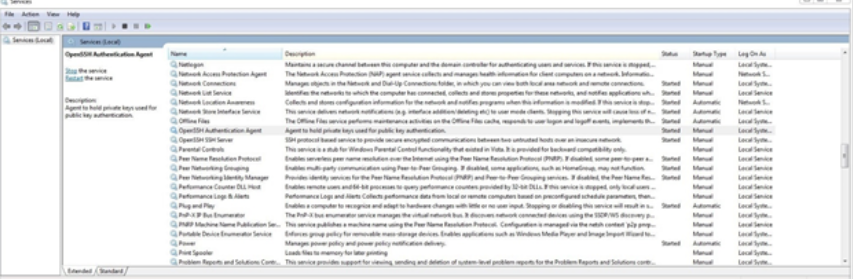
- Started the services manually or set them to open automatically, by using msc. This will create the folder “C:\ProgramData\ssh” with your host key which is crucial for the service to work.
Note: The services are named OpenSSH Authentication Agent and OpenSSH SSH Server.
Opening the SSH port in the Windows Firewall manually
Testing the SFTP server
We can use any of SFTP software clients as below:
WinSCP, FileZilla, FTP Rush or a file manager with SFTP support such as Altap Salamander
Windows
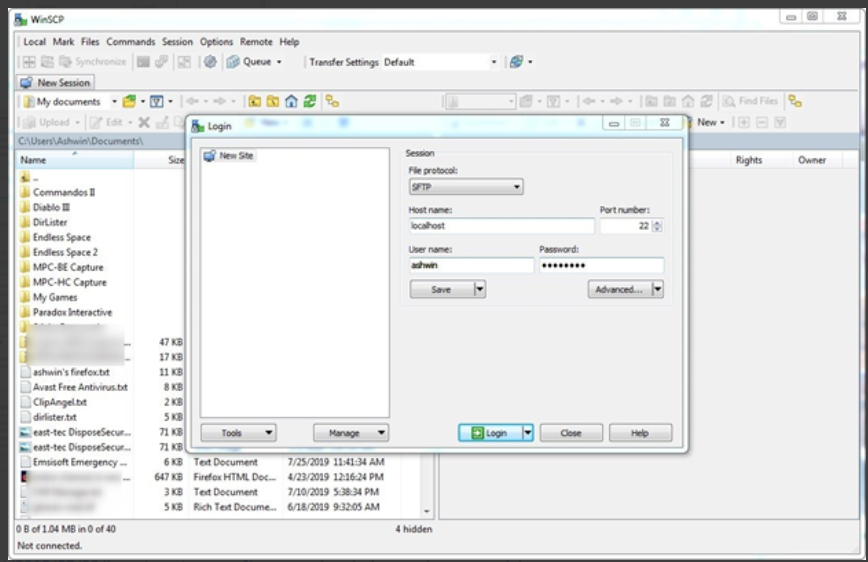
Run WinSCP and select “SFTP” as the protocol. Enter your Windows username
and password to allow the program to connect to the server.
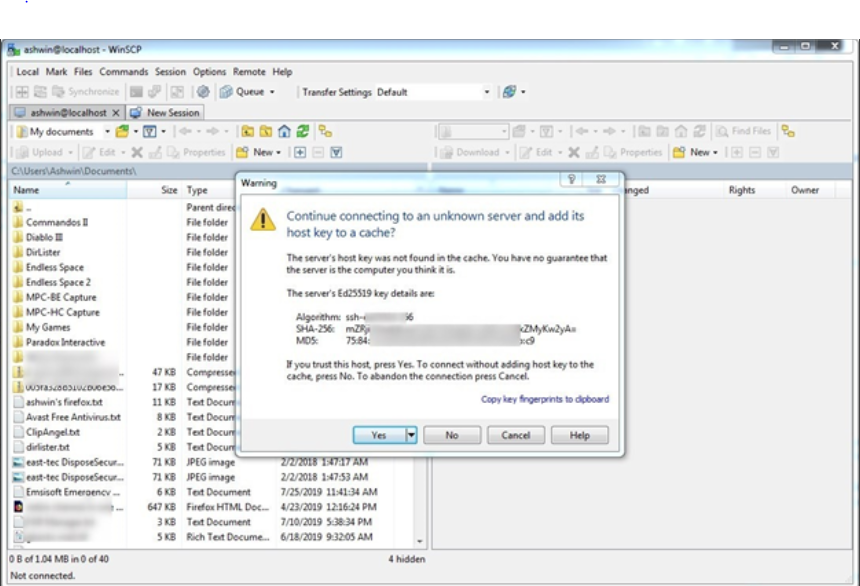
Since the server is your own computer, you can allow it.
Host key which authenticates the connection made by the device. We can use this to
transfer content from one computer to another too.